Flying Start Genie
Description
The Flying Start Genie generates Grid Components for a set of tables in a database and places them in a Tabbed UI Component, allowing you to quickly create a web application to perform CRUD operations against a database. It is a great way to get a start on a new web application.
Overview
The Flying Start Genie automatically creates Grid Components for a set of tables and views in a database. The Grid Components are placed in a Tabbed UI Component which serves as a "home page" for the web application. The Genie provides access to the properties of the Grid and Tabbed UI Components, allowing you to customize the features included in the components.
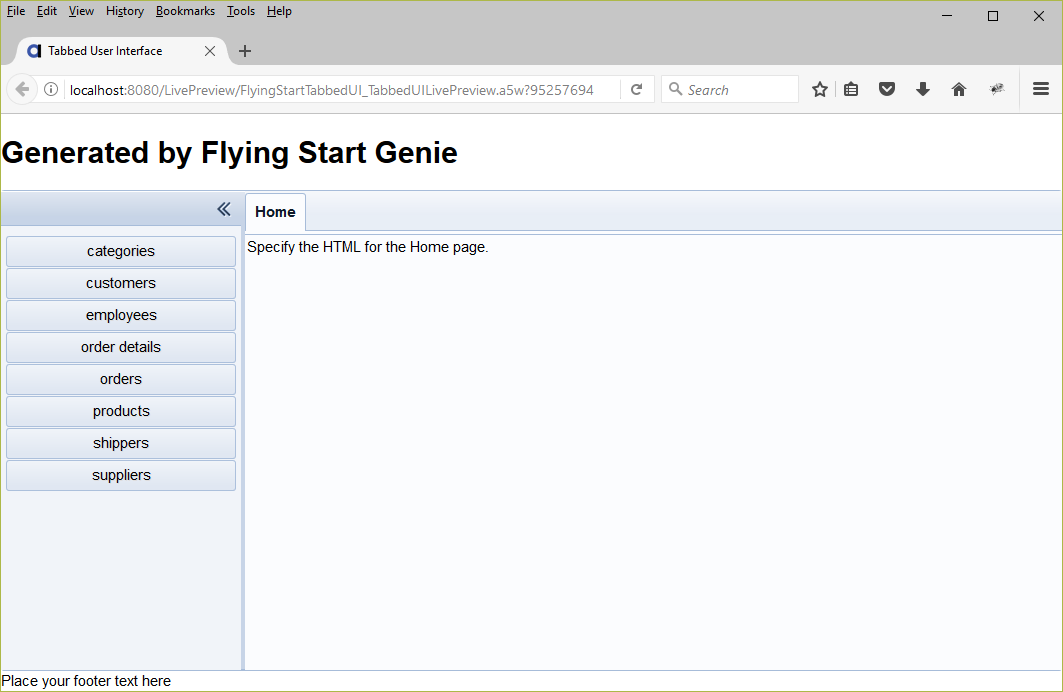
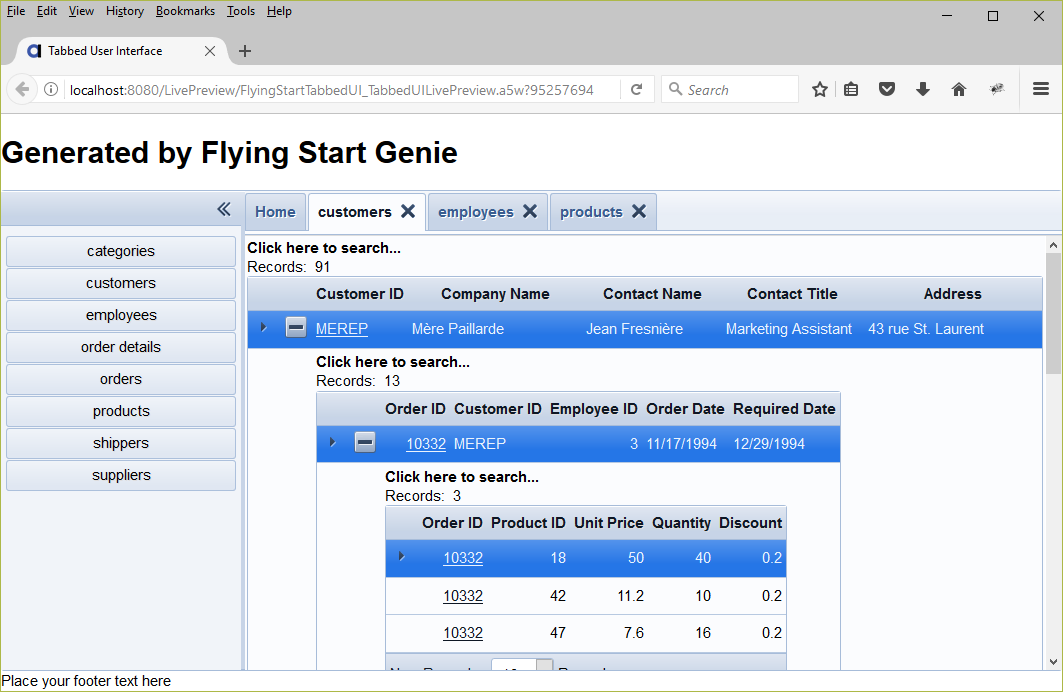
In addition to generating Grid Components and providing a Tabbed UI interface for viewing and interacting with the Grids, the Flying Start Genie also automatically creates Master-Detail views for tables that share a relationship. Data related to a parent record is included by linking the child Grid Components which can then be displayed by opening the Row Expander for a parent record. Relationships are determined based on foreign key definitions in the database.
Flying Start Genie Toolbar

The Flying Start Genie toolbar can be used to save, load, or start a new Flying Start Genie configuration for generating components for a database.
- Tool
- Description
 Save
SaveSaves the Flying Start Genie settings. If the settings were loaded from an existing saved configuration, the configuation is overwritten.

Save As. Opens the Save As dialog to save the current Flying Start Genie settings.
 Open
OpenLoad a saved Flying Start Genie configuration.
 New
NewStart with a new, blank Flying Start Genie configuration.
 Web Projects
Opens the Web Projects Control Panel.

The Development Server is running. Click to stop the Development Server.

The Development Server is stopped. Click to start the Development Server.
 Close
CloseClose the Flying Start Genie.
Flying Start Genie Tabs
- Name
- Description
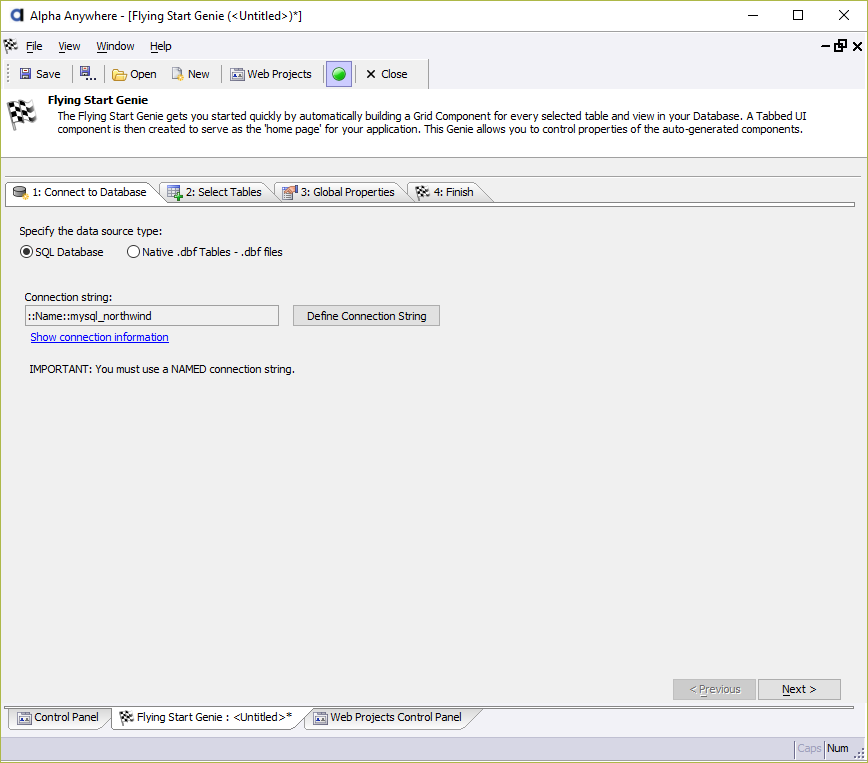
- 1: Connect to Database
The first step in the Flying Start Genie is to configure the AlphaDAO connection to the database with the tables and views used for the generated Grid Components.
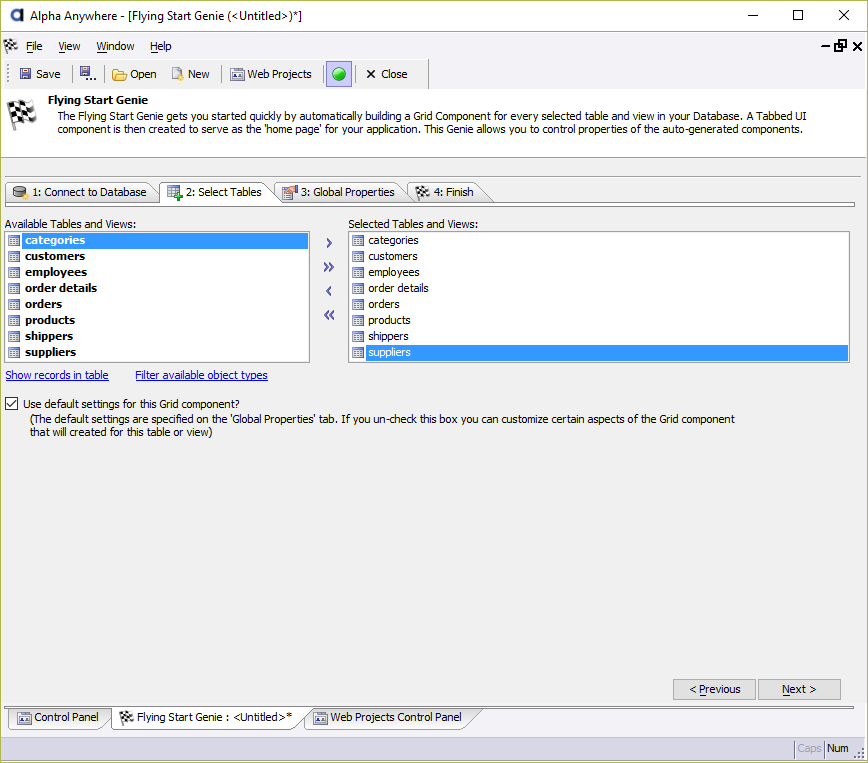
- 2: Select Tables
After the connection has been configured, the next step in the Flying Start Genie is to select the tables and views to include. On the Select Tables tab, you can also customize the Grid Component for each table, overwriting the settings defined in Global Properties.
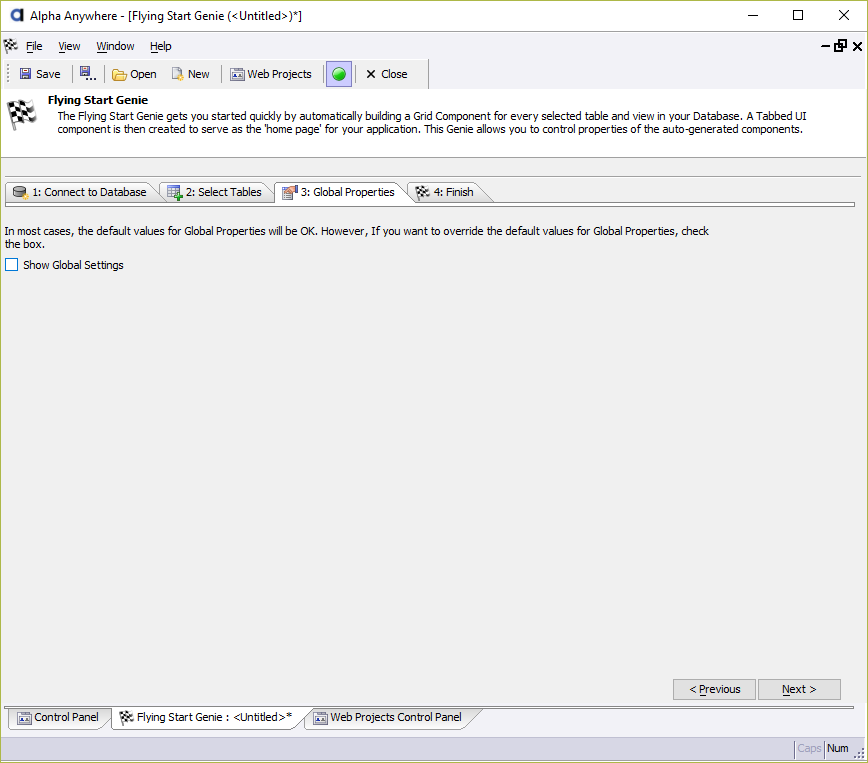
- 3: Global Properties
Specify global properties for both the Grid and Tabbed UI Components generated by the Flying Start Genie. These properties apply to all components created by the genie.
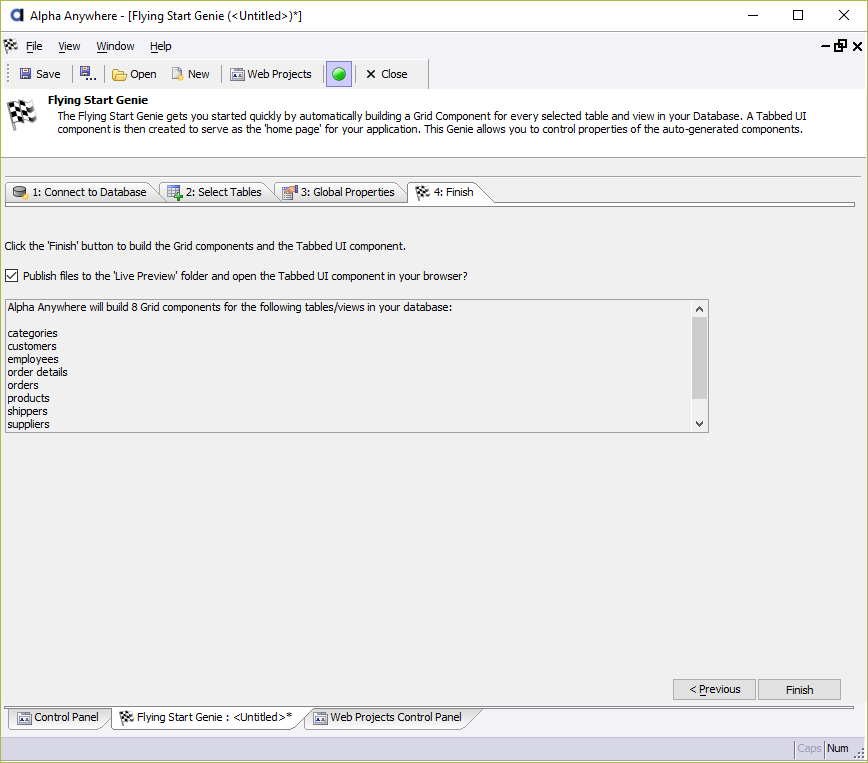
- 4: Finish
The final step before the components are generated is to review the selected tables and views. After the components have been created, you can optionally launch your web browser to view the Tabbed UI interface.
Creating an App Using the Flying Start Genie
To create a web app using the Flying Start Genie...
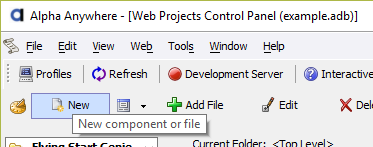
Click New File on the Web Projects Control Panel toolbar.
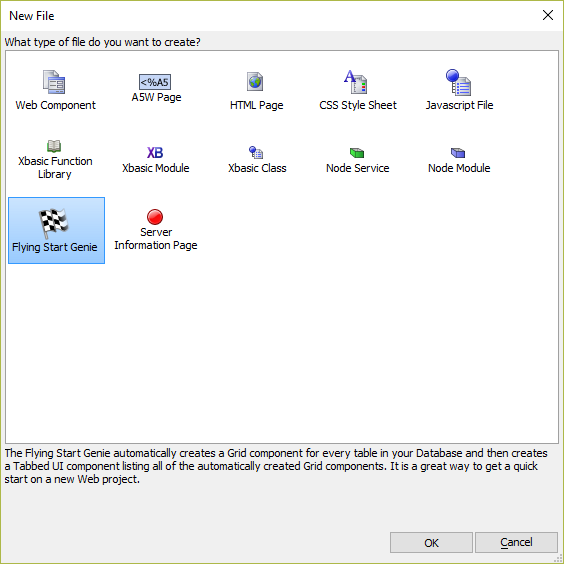
In the New File dialog, select Flying Start Genie and click OK.
Select a Named Connection string using the Select button. If no Named Connections are available, you can create one using the Manage connection strings link and then selecting it using the Select button. Click Next.
Select the tables you would like to include. Click Next.
Optionally change Global Settings that dictate how the Grid Components and Tabbed UI are generated. Click Next.
Review the selected tables. Optional check (or uncheck) Publish files to the 'Live Preview' folder and open the Tabbed UI component in your browser. Click Finish.
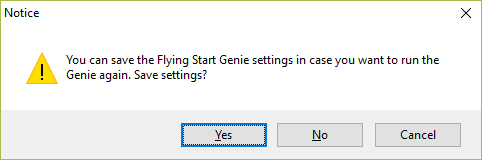
You will be asked if you would like to save your configuration. Flying Start Genie settings can be saved, allowing you to quickly re-create the Grids and Tabbed UI for the selected tables.
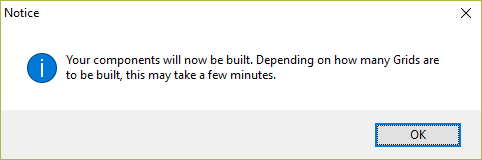
Alpha Anywhere will display a notice informing you that depending on the number of tables selected, the process may take a while. Click OK to close the notice.
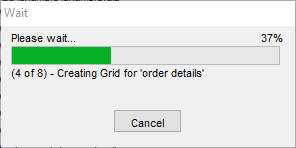
Wait for the process to complete. Alpha Anywhere will notify you when this process is complete.
Additional Resources
Tutorials
For in-depth, step-by-step instructions for using the Flying Start Genie to create a web application, check one of these tutorials:
- Build a Web App Tutorial - In this tutorial, you'll build a web application with a Tabbed UI interface that can be used to manage data in the Northwind database, an Access database that ships with Alpha Anywhere. You will learn how the Flying Start Genie can be used to quickly get started building web applications.
Videos
For additional information about the Flying Start Genie, check out the videos below:
Flying Start Genie
The Flying Start Genie allows you to get a quick start on a new Web Application by automatically creating a Grid Component for every table and view in your Database. The Genie also creates a Tabbed UI Component which serves as your "home page" for your auto-generated application.
The Flying Start Genie can be used against both SQL databases and DBF tables. Once the Flying Start Genie has created the Grid Components, you can edit any of the components in the Grid Component editor and customize any of their properties.
By default, the Grids that are automatically created for you have a Search Part and a Detail View Part. The Grids are editable and the edits are made in the Detail View part, which is set to display in a popup modal window. You can easily change these defaults for all of the Grids that are created or for individual.
See Also