Display a 'Wait...' message
Description
Display a 'wait...' message when an javascript event happens. The message can include customized text, different display times, as well as custom animations and images.
This action is used with the UX component.
Wait Message Definition
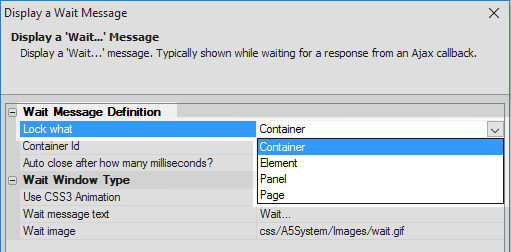
- Lock what
Specify the part of the page to lock. Controls in the locked area cannot be clicked/ edited when the wait message is displayed. The wait message is centered over the locked area. If you want to specify an explicit ID for an area to lock, select 'element'. Select 'page' to lock the entire screen.
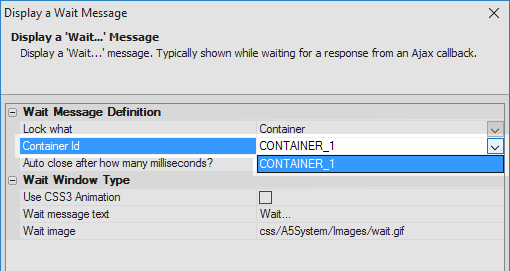
- Container Id
Specify the Id of the Container you want to display the wait message in.
- Element Id
Specify the Id of the element.
- Panel Id
Specify the Id of the panel.
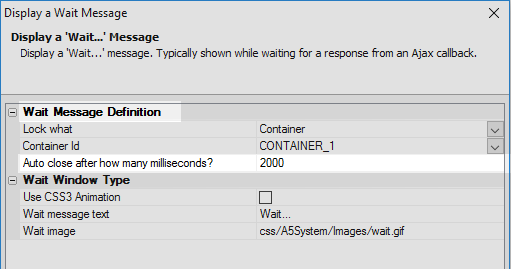
- Auto close after how many milliseconds?
The wait message will automatically be closed after a certain time interval (specified by the value in the {dialog.object}.waitMessageAutoCloseDelay property). Specify the number of milliseconds after which the wait dialog will be automatically closed. Leave blank to use the setting defined in {dialog.object}.WaitMessageAutoCloseDelay.
Wait Window Type
- Use CSS3 Animation
Specify if the wait window should use a CSS3 animation.
- Animation size
This property specifies the animation size in pixels. It appears when the 'Use CSS3 Animation' checkbox is checked.
- Wait message text
Specify the text to show in the message. You can leave this blank if you only want to show the spinner animation.
- Wait image
Specify the wait icon. Typically an animated .gif image is used.
Create a Container with a Wait Message
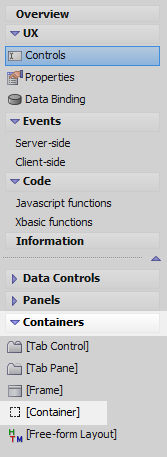
In the UX Builder on the UX Controls page open the 'Containers' menu. Click on the [Container] option.
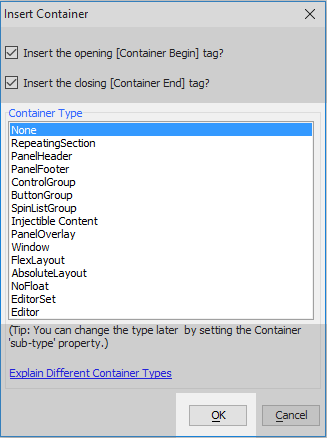
In the Container Type list select the 'None' option and click OK.
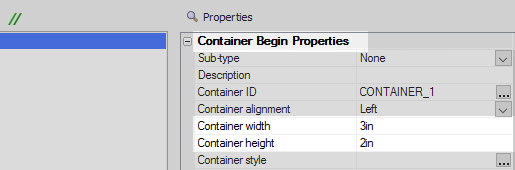
Highlight the container in the controls tree. Under the Container Begin Properties section set the 'Container width' property to be '3in' and the 'Container height' property to be '2in'.
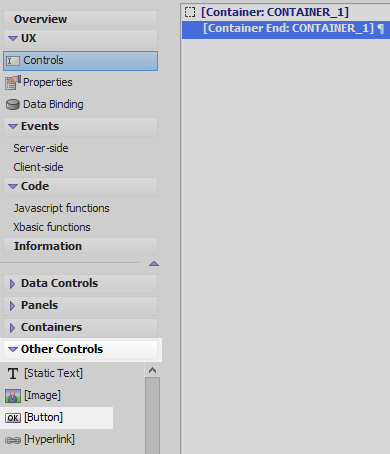
Highlight the [Container End: CONTAINER_1] tag. Open the 'Other Controls' menu and click the [Button] option to add a button to the component.
Highlight the button control in the controls tree. In the properties list on the right scroll down to the 'Javascript - (Touch, Mouse, Pointer Events)' section. Click the
 button next to the 'click' property.
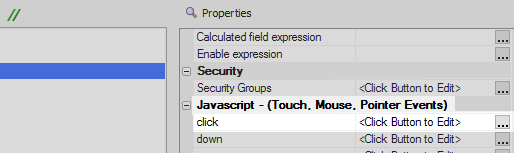
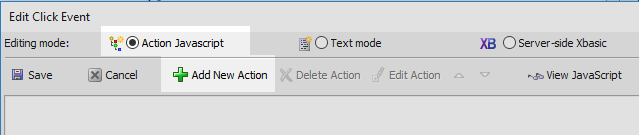
In the Edit Click Event dialog select the 'Action Javascript' radio button. Click the 'Add New Action' button with the green '+' sign.
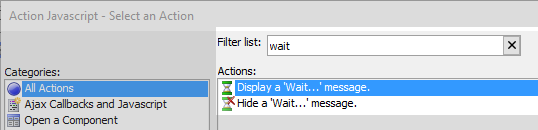
Type 'wait' into the Filter list control and from the list of available actions select the "Display a 'Wait...' message" action. Click OK.
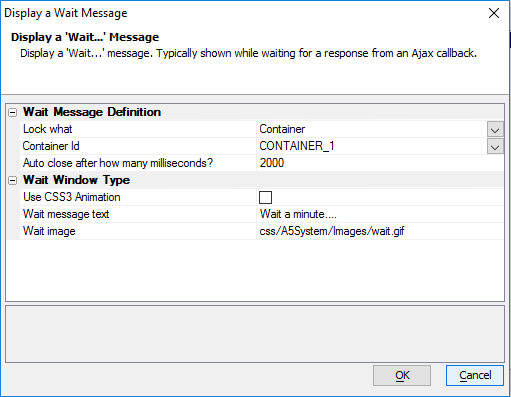
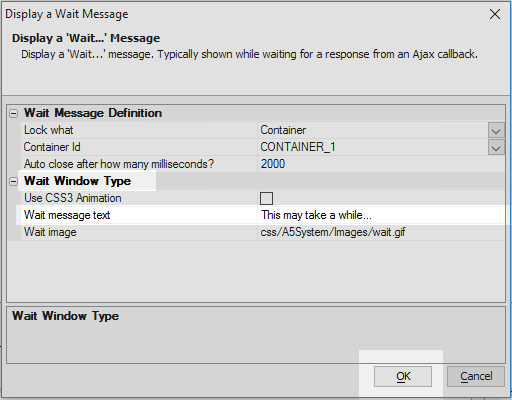
In the Display a Wait Message dialog set the 'Lock what' property to 'Container'.
Click the dropdown next to the 'Container Id' property and select the container you defined, CONTAINER_1.
Set the 'Auto close after how many milliseconds?' property to 2000.
In the Wait Window Type section set the 'Wait message text' to read 'This may take a while...' and click OK, OK, and Save.
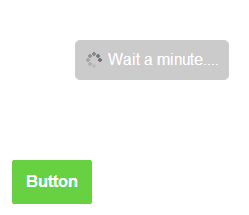
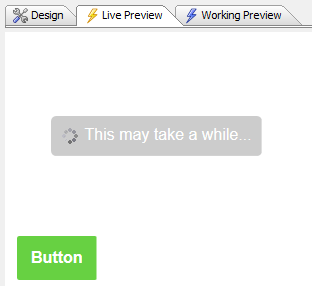
Run the component in Live preview. Click the button and you should see a wait message displayed.
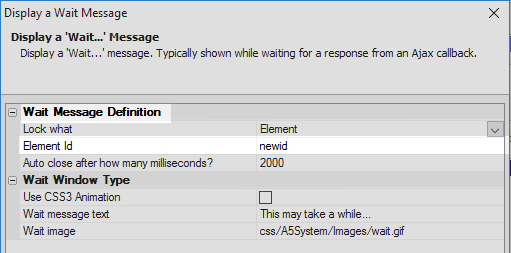
Displaying a Wait Message in an Element
You can display wait messages in html elements, as opposed to a container. To do this follow the guide above, though instead of adding a [Container] control do the following:
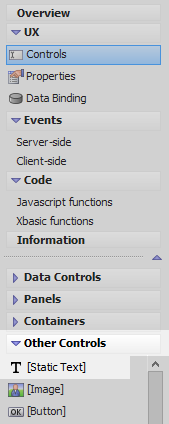
Go to the 'Other Controls' menu and add a [Static Text] control to the component.
In the Static Text control's properties set the 'Static text' property to be a <div> tag that contains an id, in this example "newid"
<div id="newid"></div>

When you define the javascript action for the wait message select 'Element' from the 'Lock what' property dropdown.
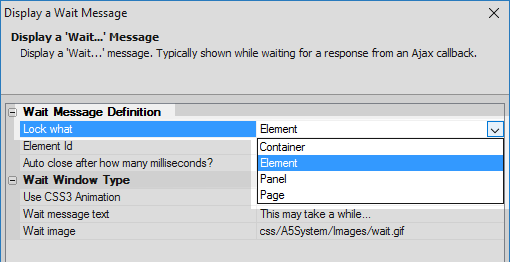
Set the Element Id property to be the id of the div that you defined in the static text control, in this case "newid".
See Also