Image Upload
- Application type
- Mobile Settings
- HTML5 Image Capture Settings
- Cordova / PhoneGap Settings
- Image File Upload
- Amazon S3 Storage Properties
- Customization - File Select Window
- Customized Error Messages
- Server-side Events
- Client-side Events
- Thumbnails
- Filename for Uploaded File
- File Rename
- Xbasic Event Handlers - Control Values
- Image Upload in a UX Component
- Videos
Description
Upload an image to Amazon S3, Wasabi Storage, or the Application Server.
Discussion
The Image Upload action uploads to storage from the device, either to a folder on the Application Server or a bucket on Amazon S3 or Wasabi Storage. On mobile devices, the image can be uploaded from the camera roll or captured using the device's camera.
If your application will be deployed to Alpha Cloud, you can only upload images to Amazon S3 or Wasabi Storage using this action. Storing files on the server file system on Alpha Cloud is not supported.
The Image Upload action requires an Image control in your application. This can be an image field in a Grid or an Image data control in a UX component.
Application type
- Application type
Defines the type of application that your building. The Image Upload action needs to know what type of application it is running within. There are two types of Applications:
- Type
- Description
- Desktop
The application will be run in a desktop environment. This includes both web apps and desktop apps.
- Mobile
The application will be run in a mobile environment, such as a Cordova mobile app or mobile web app.
Mobile Settings
When Application type is set to "Mobile", these settings are exposed.
- Cordova/PhoneGap or HTML5
Defines what type of Image Upload to use in the mobile app:
- Type
- Description
- Cordova
App is a Cordova mobile app. Uses the Cordova plugins to capture the image.
- HTML5
App will run in a mobile web environment. Use HTML5 image capture.
HTML5 Image Capture Settings
When Application type is set to "Mobile" and Cordova/PhoneGap or HTML5 is set to "HTML5", these settings are exposed.
- Resize and compress image before upload?
Native image files are quite large and should be compressed prior to uploaded.
- Compression folder
Valid compression factors are from 0.1 to 1.0, with 1.0 being minimal compression.
- Image Max Width
Maximum image width of uploaded image, aspect ratio will be maintained. This value is optional. The default is 1024.
- Image Max Height
Maximum image height of uploaded image, aspect ratio will be maintained. This value is optional.
Cordova / PhoneGap Settings
When Application type is set to "Mobile" and Cordova/PhoneGap or HTML5 is set to "Cordova", these settings are exposed.
- Using Cordova
This property must be checked if the component will be used in a Cordova mobile application. Otherwise, Image Upload will not work on the mobile device.
- Cordova picture source
Picture source can be Photo library or Camera.
- Image quality
Determines compression factor, a number from 1 to 100 is valid. 50 is recommended due to memory constraints.
- Allow editing
Allows the user to zoom and crop the image prior to final image selection.
- Image width
Saved image width, optional. The default is 1024.
- Image height
Saved image height, optional. The default is 1024.
- Save picture to photo album
When enabled, the image is saved to the device's photo library.
Image File Upload
- Image field
Specify the name of the field in the component that will display the uploaded image. If the image field is a binary field, the image data is assumed to be stored in the data source. If the image is a character field, the image file name is stored in the field and the image itself is uploaded to Storage, either on the Application Server (not supported on Alpha Cloud) or Amazon S3.
- Scale image
You can optionally scale the image before it is saved on the server, or embedded in a component field.
- Allowed image filename extensions
Shown when Application type is "Desktop". Specify a comma delimited list of allowed filename extensions. If the user uploads a file that does not match an allowed extension, the operation is aborted.
- Invalid extension error message
Shown when Application type is "Desktop". The message to display when the selected file is not an allowed file type.
- Upload target
Shown when Application type is "Desktop" and the Image field is a Character field. Specify if the image should be uploaded to the Alpha Anywhere server, or to a cloud storage provider (e.g. Amazon S3).
- Target
- Description
- Server
Upload the image to the Application Server and store it in a folder on the server. Not supported on Alpha Cloud.
- AmazonS3
Upload the image to a bucket on Amazon S3 or Wasabi Storage. Image is uploaded directly to Amazon S3 or Wasabi Storage from the application, bypassing the Application Server.
- AmazonS3Indirect
Upload the image to Amazon S3 or Wasabi Storage from the Application Server. The image is uploaded to the Application Server before being stored on Amazon S3 or Wasabi Storage.
- Upload folder
Shown when Application type is "Desktop".
Defines the folder where the image should be stored in the target storage location. Specify the name of the folder where the uploaded image file will be stored. You can use aliases in the name.
If uploading to the Application Server, the folder is a location on the server, not the development machine. If no drive letter is specified, the folder is assumed to be in the webroot on the Application Server.
If the Security Framework is enabled, Upload target is set to "Server", and the upload folder is in the webroot, you must configure access permissions for the folder in the project security settings. If access is not explicitly defined for the folder, Alpha Anywhere will treat the folder as Always Denied.
- File exists action
Shown when Application type is "Desktop". If the file that was uploaded already exists in the Upload folder, what action should be taken. You can either overwrite the existing file, or rename the uploaded file.
- Embedded Image format
Shown when Application type is "Desktop". Specify the image format to use for the embedded image. All embedded images must be stored in the same format. So, for example, if the user uploads a .bmp image and the Embedded Image Format is JPG, the image will be converted to JPG before it is stored in the database.
- Stored filename transformation expression
Shown when Application type is "Desktop". Specify what value to store in the image field. This is typically some transformation of the uploaded image filename. If you leave this blank, the fully qualified filename is stored in the image field.
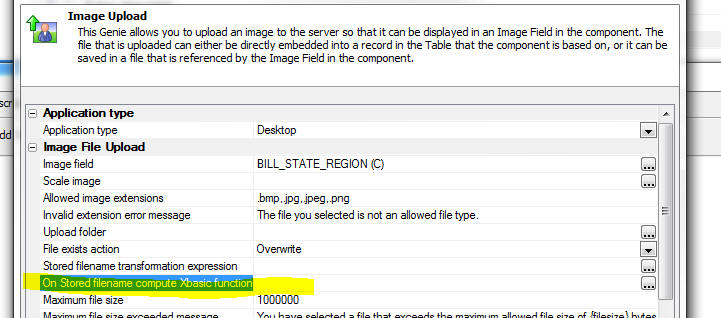
- On Stored filename compute Xbasic function
(Optional) Shown when Application type is "Desktop". If you want complete control over the filename of the uploaded image, you can call an Xbasic function to compute the filename.
- Maximum file size
Specify the maximum file size that can be uploaded. Specify value in bytes. Specify 0 if you do not want to restrict the size of the file that can be uploaded. IMPORTANT: Regardless of this setting, the server also specifies a maximum POST body size. The lower of this setting and your setting for this property will apply.
- Maximum file size exceeded message
Specify the message to display to the user if the uploaded file exceeds the maximum allowed file size.
- Create image thumbnails
Specify if the image thumbnails should be created from the uploaded image? You can create multiple thumbnails in different sizes.
- Show progress/ allow cancel
Shown when Application type is "Desktop". On certain browsers it is possible to show progress while files are being uploaded and to allow the user to cancel the operation. IE9 and earlier does not support this feature.
- Abort upload button label
Shown when Application type is "Desktop". Specify the text for the Abort button. This button allows a user to stop an upload before it has completed.
- Abort upload message
Shown when Application type is "Desktop". Specify the message to show if the user aborts an upload.
- Progress bar type
Shown when Application type is "Desktop". Specify the type of progress bar. The 'A5' bar uses a specially styled progress bar that blends well with the selected component style. If you are using certain styles (e.g. GrBlue, GrOlive, etc.) you may want to switch to the 'Basic' style.
Amazon S3 Storage Properties
Shown when Upload target is set to "AmazonS3" or "AmazonS3Indirect".
- S3 folder function
An optional Xbasic function that computes the object and folder name where the image should be stored in the bucket.
- Method for specifying Amazon S3 credentials and bucket
Defines how AmazonS3 credentials will be specified for the Image Upload action.
- Type
- Description
- Named Storage Connection String
Use a named storage connection defined in the Storage Connections dialog. Exposes the Storage connection string property.
- Explicit
Explicitly define AmazonS3 credentials. Exposes the Access key, Secret, Bucket, and Region properties.
- Storage connection string
The named storage connection string for an AmazonS3 bucket.
- Access key
Your AmazonS3 Access Key.
- Secret
Your AmazonS3 Secret.
- Bucket
The name of the AmazonS3 bucket where images will be uploaded.
- Region
The region where you AmazonS3 bucket resides.
- Authenticated read
If enabled, the uploaded image is configured to require authentication before it can be read from the bucket.
Customization - File Select Window
When Application type is set to "Desktop", these settings are exposed.
- Window title
Specify the title of the File Select dialog window.
- Window position
Specify where the window will be shown.
- Sub-theme
Specify the window sub-theme
- Auto upload
Specify if the should be uploaded as soon as the user has selected the file to upload. Alternatively, the upload will only start once the user has clicked on the 'Upload' button.
- Working message
Specify the working message to display while the file is being uploaded to the server.
- Upload button
Specify the button text for the 'Upload' button.
- Watermark
Specify the watermark text that appears in the file box. If you use a language tag for the text, be sure that the language definition returns a URL encoded value. See hyperlink below for more help.
- File select button image
Select the image that appears on the button to open the file select window.
- Prompt
Specify the text for the prompt that appears above the file box. If you use a language tag for the text, be sure that the language definition returns a URL encoded value. See hyperlink below for help.
- Window height
Specify the height for the pop-up File Select window.
- Window width
Specify the width for the pop-up File Select window.
- Cancel button label
Specify the label for the Cancel button. Before the image is uploaded, this button closes the dialog. If a confirmation dialog is shown after the image is uploaded, this button aborts the action and does not save the uploaded image to the database.
Customized Error Messages
- Table not updateable
Specify the message to show if the table is not updateable because the logged in user does not have permission to update this table.
- Field not updateable
Specify the message to show if the field is not updateable because the logged in user does not have permission to update this field.
- Session expired
Specify the message to show if the session has expired. This error could occur if the 'Close File Select window after upload' property is false, the user uploads an image, but then does not click the 'OK' to save button immediately.
Server-side Events
When Application type is set to "Desktop", these settings are exposed.
- Before save
Specify the name of the Xbasic function to call after the file has been uploaded, but before it has been saved into the target field in the component. You can use this function to execute code that checks if the binary data that was uploaded is a valid image, or you might want to call a function that scales the image before it is saved to the database. This Xbasic function must be defined in the 'Xbasic functions declarations' section. This function can optionally abort the action.
Client-side Events
- Before upload
Specify the name of the Javascript function to call before the file upload window is shown. If this function returns false, the upload is aborted.
- After upload
Specify the name of the Javascript function to call after the file has been successfully uploaded.
Thumbnails
One or more thumbnails can be generated when an image is uploaded. Check Create image thumbnails to enable thumbnail creation. Then, click the  smart field button to open the Thumbnail definition to define how thumbnails are generated.
The Define Thumbnails dialog is used to specify one or more thumbnails. The Add New Thumbnail button adds a new thumbnail definition. You must specify how to generate the thumbnail when creating the definition. There are two methods for generating thumbnails:
- Specify a ratio
The ratio specifies how to scale the image. Ratio is specified as decimal value representing the percentage to scale the image. A value less than 1 will scale the thumbnail smaller than the original image while a value greater than 1 will scale the thumbnail larger. For example, to make the image 50% (half) it's original size, you would enter 0.5. A value of 1.5 would generate a thumbnail image 150% of the original image (50% larger).
If the ratio is 0 or 1, no scaling is applied.
- Specify absolute image size
The absolute image size defines a fixed width and/or height for the thumbnail. You can either choose to scale the image proportionally, to preserve the image ratio, or specify the width and height of the thumbnail independently of each other.
If the Scaling method is set to scale the width and height proportionally, you must define the maximum dimension for the scaled image (in either inches or pixels). The maximum dimension can be either the Width, Height, or whichever dimension is longer (the Maximum dimention). If the Dimension is set to 0, no scaling is applied.
If scaling is done independently, you must specify both the Width and Height of the thumbnail. If both the width and height are set to 0, no scaling is applied.
Filename for Uploaded File
When you upload an image or a file to a target character field (rather than a binary field), the uploaded file is saved in a file in the UploadFolder (defined in the builder) and the filename of the file is saved in the target character field. The filename is derived from the filename of the file on the client machine.
A property in the builder allows you to define an Xbasic function in which you can compute the filename to use for the uploaded file.
As shown in the screenshot below, the new 'OnStoredFilename Compute Xbasic Function' property allows you to define the name of an Xbasic function. The Xbasic function exposes the 'e' object which has these properties:
- Property
- Description
- e.targetFileName
the filename for the uploaded file (computed based on the setting for the UploadFolder and the name of the file on the client machine
- e.imageBinaryData
binary data that was uploaded
You Xbasic function can change the value in the e.targetFileName property. If you do change this value, the uploaded file will be stored in the filename specified by the new value in e.targetFileName
Your code can optionally set a value for e.storedValue property in the e object. If you set the e.storedValue property, this value will be stored in the target field in the record (and the transformation expression will be ignored).
File Rename
When you upload images or files and store the uploaded images or files in a filename on a server, there is an option to rename the file if there is an existing file with the same name on the server. Here is how the algorithm that computes the filename in the case of a conflict works. If a filed called "c:\myimages\image1.jpg" exists and you want to create a new file called 'image1.jpg', the new file will be called "c:\myimages\myimage1_1.jpg".
Xbasic Event Handlers - Control Values
In a UX component, when the server-side Xbasic events defined in the Action Javascript builder fire, the control values for all of the controls on the UX are available to the Xbasic code. For example, assume that the UX had a control called 'FIELD1'. In the Xbasic event handlers, you can reference this value as follows
request.variables.v.r1.field1
Image Upload in a UX Component
You can upload to an Image control on the component that is, or is not, data bound.
If you upload to a 'data bound' image, then when you submit the UX component, the image field in the table is updated. Watch the video below to learn more.
If you upload to a 'non-data-bound' image control, then when you submit the UX component, your event handler can choose what to do with the uploaded image. Watch the videos below to learn more.
In the case where you upload an image to a non-data bound image control, the afterDialogValidate event needs to load the image from its saved location and store the image in its final destination on the server - either on disk or in a database.
The code example below demonstrates how to get the uploaded image. This example assumes the image was uploaded for an Image control called 'MYIMAGE':
dim blobKey as c
'Every image control has an associated control with a '_hiddena5fn' name.
'After the image has been uploaded, it is stored in temporary session storage
'The 'key' for the data in session storage is stored in this hidden field.

blobKey = e.dataSubmitted.myimage_hiddena5fn
blobKey = word(blobKey,1,":")

dim blobUploaded as b
Session.GetDataFromFile(blobUploaded,blobKey)
Session.DeleteSessionFile(blobKey)

'You now have the uploaded image data in a variable called 'blobUploaded'
'Your event handler can process this data.
You can also upload images to image controls in Repeating Sections. Watch the video below to learn more.
Videos
Image Upload
Image Upload Feature allows you to upload images from the user's machine to the server. Here are some of the things you can do with the Image Upload:
- Define a button that will upload an image to the server and store the filename of the uploaded image in a field in the current Grid record (this is a "linked image").
- Define a button that will upload an image to the server and store the binary contents of the file in a BLOB field in the current Grid record (this is an "embedded image").
- Scale the uploaded images before they are saved. You can scale the image by specifying a percentage of the source image, or you can specify absolute dimensions (in either inches or pixels).
- Optionally preview how the image looks in the Grid after is has been uploaded, and then undo the action.
- Turn on the "Insert image" button in the HTML editor (used for editing memo fields in the current Grid record) so that you can upload images to the server and then put the image in the HTML memo that you are editing.
- Upload images to the server and insert hyperlinks to these images in the HTML text editor.
- Watch Video - Part 1
- Watch Video - Part 2
- Watch Video - Part 3
- Watch Video - Part 4
- Watch Video - Part 5
- Watch Video - Part 6
Image Upload to a New Grid Record
The Image Upload action in Action Javascript allows you to upload images to the New Record row. You can also specify an image to show if there is no image associated with a record. You can embed images directly in the HTML (as base64 encoded values), and you can scale images on the server before rendering the HTML.
Image Upload in a UX
Learn how to use the Image Upload action in a UX component.
Image Upload to an Image Control that is not Data Bound
When you upload an image in a UX component, you often are uploading to a "data-bound" image control. However, it is not required that the Image control to which you upload be data bound. In fact, there are many use cases where you want to upload an image and process the uploaded binary data as you see fit.
In this video, we show how you can upload images to a non-data bound image control.
Accessing the Camera
A common requirement in Mobile applications is to access the camera or photo library so that a picture can be taken and then uploaded to the server, where the picture will be stored in a binary field in a table, or in a folder on the server.
This is easily done using the built-in "Image Upload" action in Action Javascript. There are two methods for accessing the camera. You can use HTML5 (if the browser on the native device supports HTML5 camera access), or Cordova/PhoneGap (if your application is running in a native shell that uses Cordova).
This video shows how the Image Upload action in Action Javascript can be used to create a button to access the camera.
Creating Thumbnails for an Uploaded Image
When you use the "Image Upload" action in Action Javascript to upload an image (which in the case of a mobile application is likely to have been obtained by using the camera on the device), you might want to automatically create thumbnail versions of the image that was uploaded.
This video shows how this is easily done by setting a property in the "Image Upload" action in Action Javascript.
Image Upload to a Character Field
When you upload images in either the Grid or UX component, the target field can either be a binary field or a character field. In the case of a character field, the filename of the image is stored in the field and the image file itself is stored in a file in the specified 'upload folder'.
The filename of the image that is stored in the target character field can be a fully qualified filename, or more likely, you will store the 'shortfilename' (i.e. a relative filename).
If you choose to store the 'shortfilename', then you must configure an image path property so that the image filename can be resolved.
This video discusses this issue.
Tutorial: Uploading Files and Images to a Data Bound UX Component
When you upload a file or an image to a data bound UX component, the assumption is that you want to store the uploaded image or file in the record to which the UX component is bound. You can either store the binary data that was uploaded in a field in the record, or you can save the binary data that was uploaded into a file on the server and then store the filename of the file in a character field in the record.
In this video we show how image upload and file upload to a data bound UX component can be done. Images and files are uploaded to both binary and character fields in the record.