Let's check out our Equipment Inspection form on the Alpha TransForm mobile app.
Install the Alpha TransForm Mobile App
To view our form, we need to first install the Alpha TransForm mobile app. Go to the iOS or Android App store and search for "Alpha TransForm" or scan one of the QR Codes below.
iOS
Android
Select "Alpha TransForm" from the search results and install the Alpha TransForm app. The Alpha TransForm app has the logo shown below:

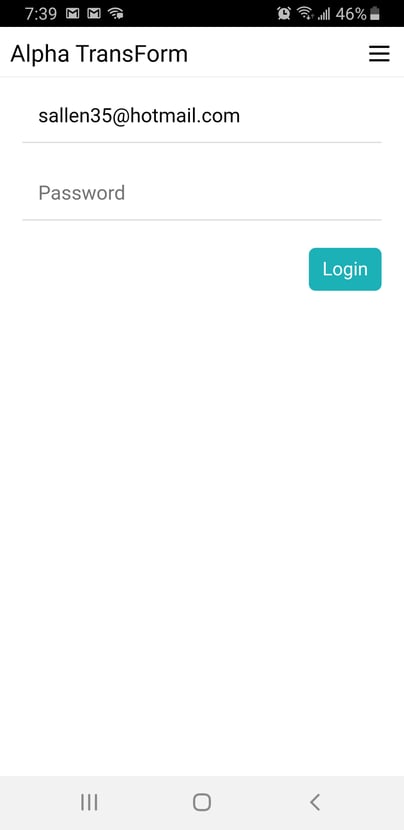
Login to Alpha TransForm
- Launch the Alpha TransForm app on your mobile device.
- When prompted, log in to the Alpha TransForm app. Use the same email address and password that you used for your TransForm Central account.
Create a New Equipment Inspection Form
Add Form is where you can create a new form from a list of Form Types. Let's create a new Equipment Inspection form.
- Tap + Add a Blank Form

- After you + Add a Blank Form, you should see the Equipment Inspection form you created in TransForm Central. Create a new Equipment Inspection form by tapping the Equipment Inspection form.
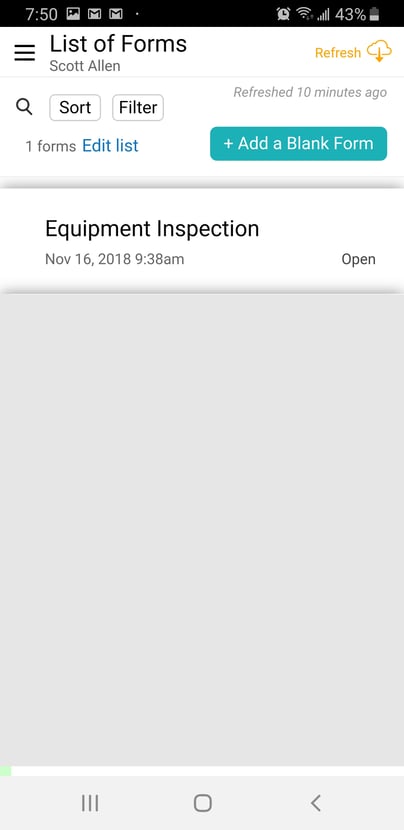
- After tapping Equipment Inspection, TransForm will open a new, blank copy of the Equipment Inspection form.
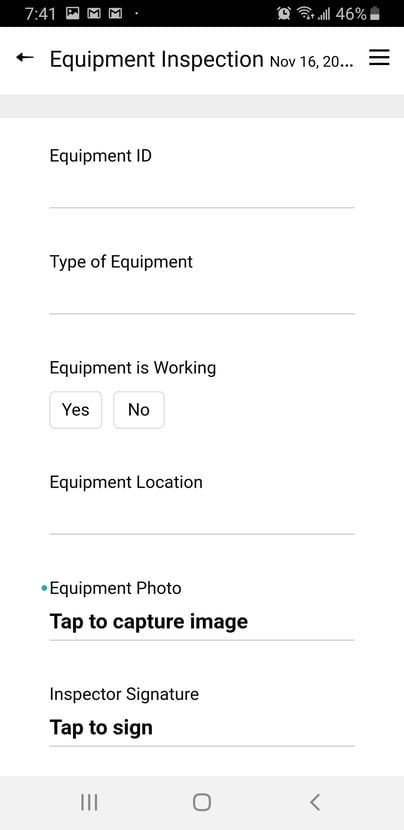
Fill out the Equipment Inspection Form
Let's fill out the form.
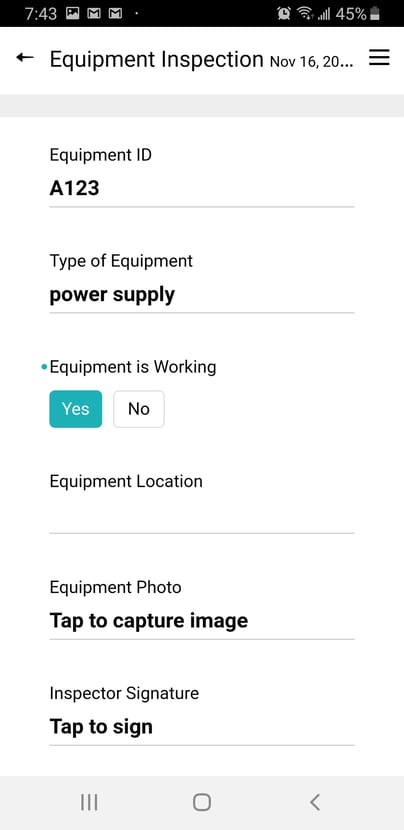
- Tap the Equipment ID field. This opens the text editor. Then type
A123 for the Equipment Id number and then click OK.
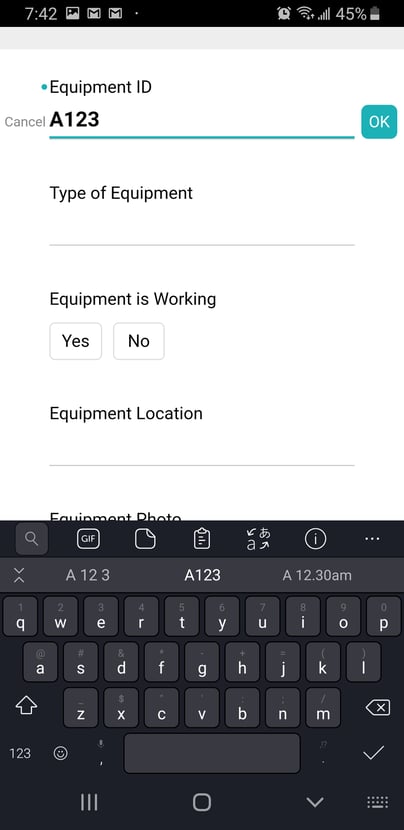
- In the header, you will see 4 buttons: a Checkmark, an 'X', a left arrow, and a right arrow. These buttons are used to save, cancel and navigate the fields in the form:

- Checkmark - Saves the changes to the field and returns to the form.
- 'X' - Cancels changes to the field and returns to the form.
- Left Arrow - Saves the changes to the field and navigates to the previous field in the form.
- Right Arrow - Saves the changes to the field and navigates to the next field in the form.
In addition to using the arrow buttons, you can also swipe to navigate to the previous (swipe from left to right) or next (swipe right to left) field in the form.
Tap the Checkmark to save your changes and return to the form.
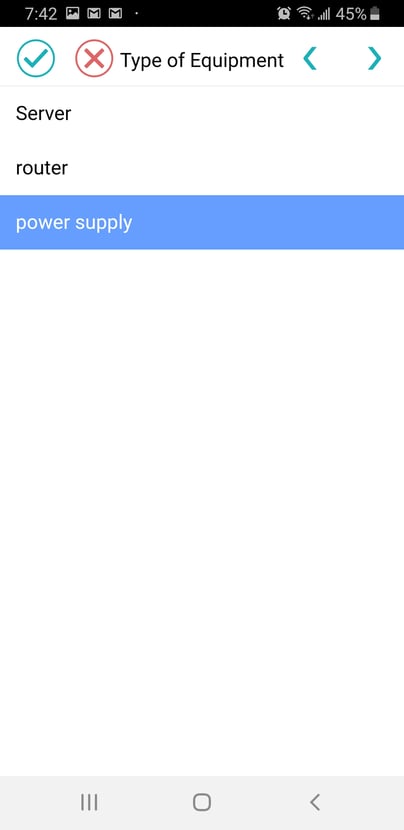
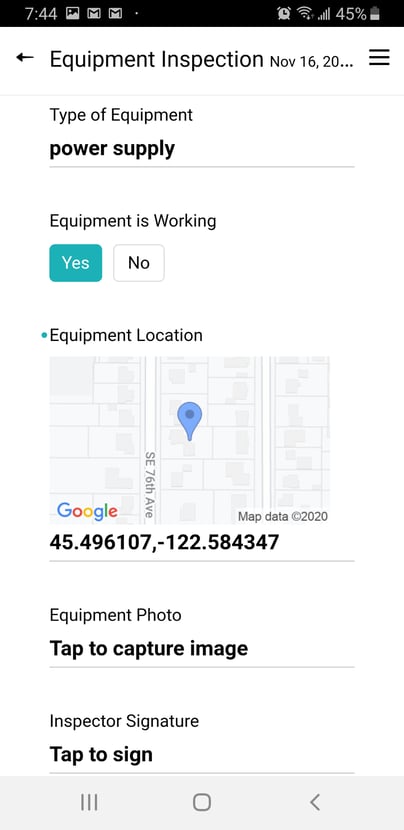
- Next, tap the Type of Equipment field. The Type of Equipment list will slide into view. Tap on power supply to select it from the list of equipment types. Then, tap the Checkmark to save your selection and return to the form.
- Let's assume we have inspected the power supply and found that it works. Tap Yes for the Equipment is Working field.
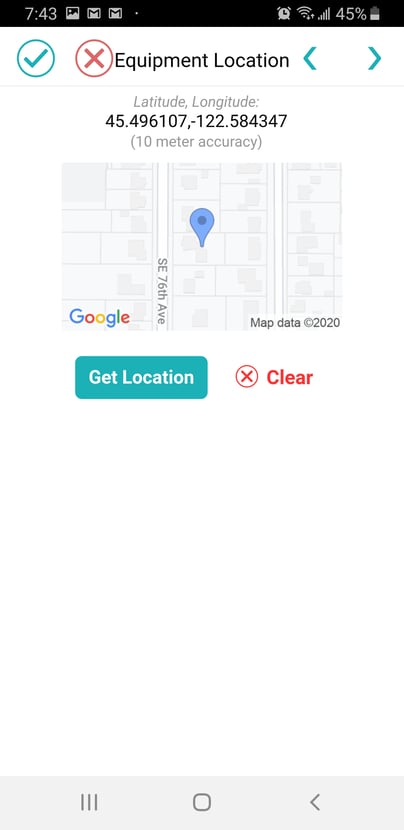
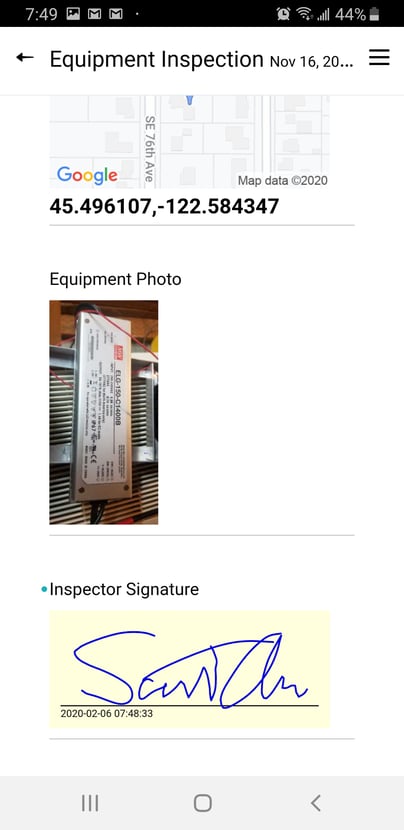
- Tap the Equipment Location field. The location editor captures your current location. To do this, tap the Get Location button. Capturing the location can take a little time to get an accurate reading.
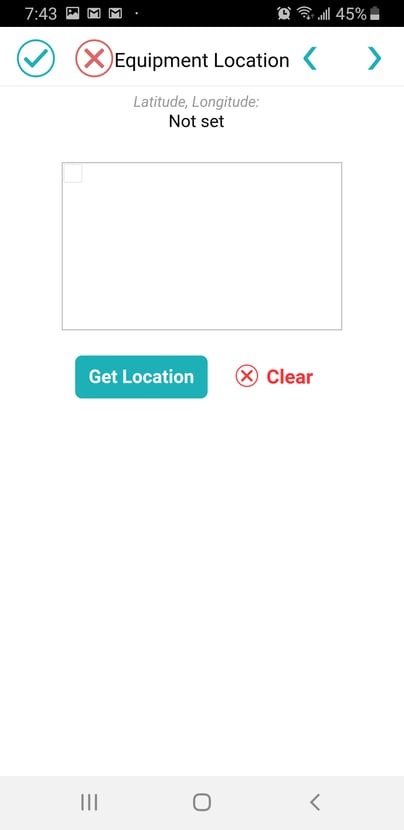
When the process completes, a map will appear with the captured location. If you are in an area with no wifi or cell service, the map won't appear. Don't worry, TransForm will still accurately collect the GPS coordinates without a wifi or cell connection.
Note: In order to capture your location, Alpha TransForm must have access to your device's GPS. If location capture fails, open your device's settings and make sure location services are enabled and have been granted to Alpha TransForm.
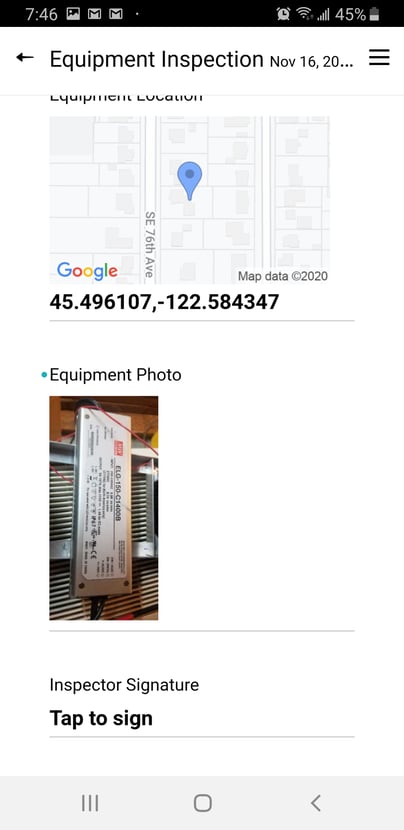
- Tap the Checkmark button to return to the form. Then, tap the Equipment Photo field.
- Tapping the photo field will open the camera so you can take a picture. Take a photo of a nearby object.
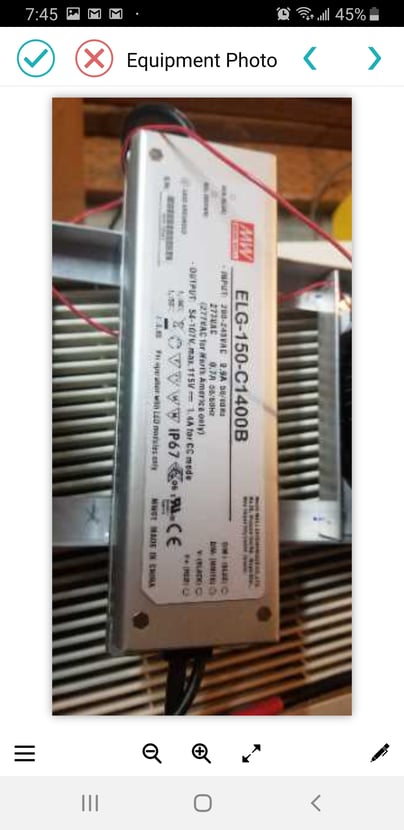
- When you are asked if you want to use the photo or retake it, choose Use Photo.
Note: On some Android Devices, you will see an X and a Checkmark instead of "Retake" and "Use Photo".
- Tap the Checkmark button to save the photo in the form.
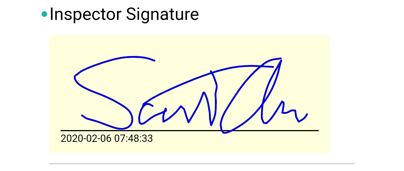
- The last thing you need to do to complete the form is sign the Inspection Signature field. Tap the Inspection Signature field to open the signature editor.
- Using a stylus or your finger, sign the screen. When you are done, tap the Checkmark button to save the signature and return to the form.
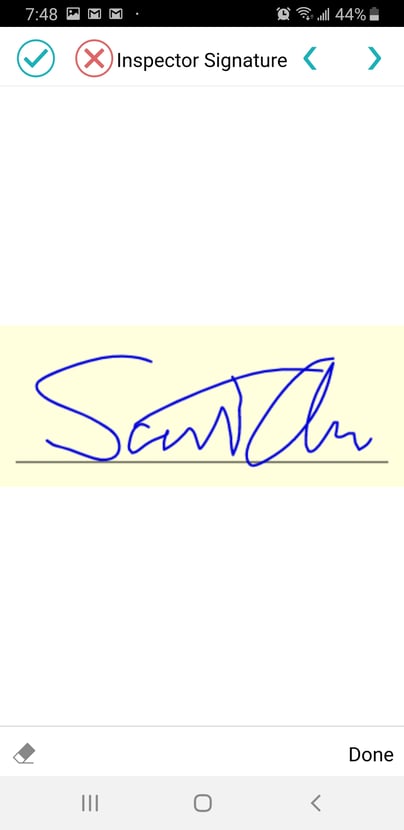
- Note that in addition to the signature, the date and time of the signature was also captured - shown below the signature on the form.
- Now that all of the fields have been filled out, we can exit the form. Tap Done to return to the list of forms.tap
Uploading Forms to TransForm Central
So we’ve filled out the form and all of the data is saved on the mobile device. Now it’s time to upload that data so we can see it in TransForm Central.
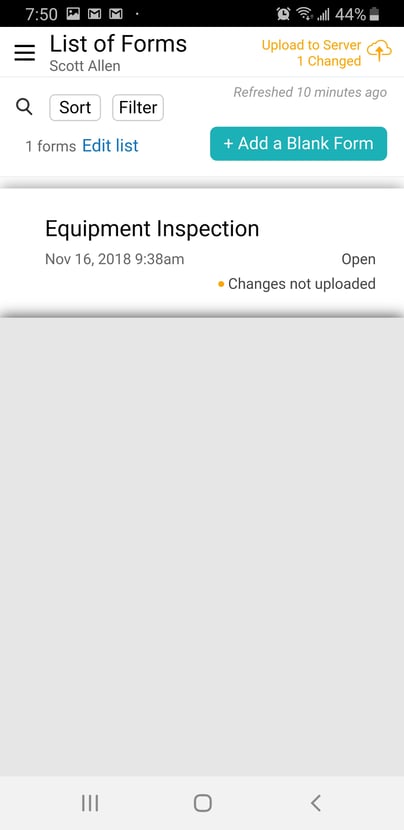
Before we do, take a look at the the orange dot on the form. The orange indicates this form has not yet been saved to the TransForm cloud. Forms can have one of the following states:
- No Color Dot - Form has no changes and has been uploaded to the TransForm cloud.
- Blue Dot - Form is new but has not been saved to the TransForm cloud.
- Orange Dot - Form has been modified but has not been saved to the TransForm cloud.
- Black Dot - Form has been deleted but has not been removed from the TransForm cloud.
- Red Dot - Form contains errors that must be resolved before it can be saved to the TransForm cloud.
Forms are saved to the TransForm cloud using the Upload unsaved button. Tap the Upload 1 unsaved button to upload the form to the TransForm cloud.
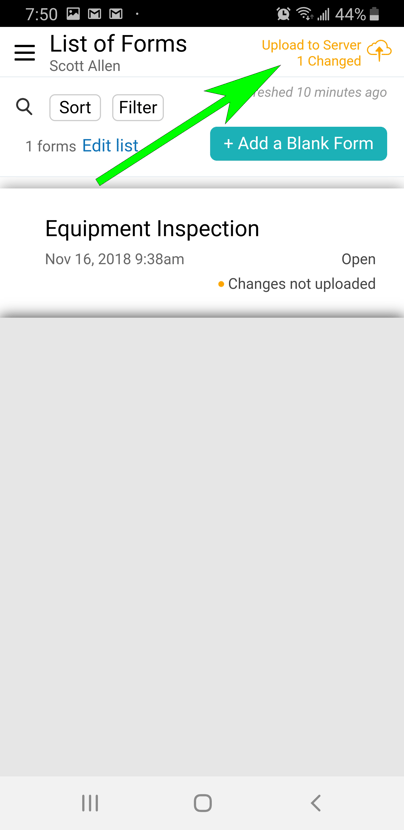
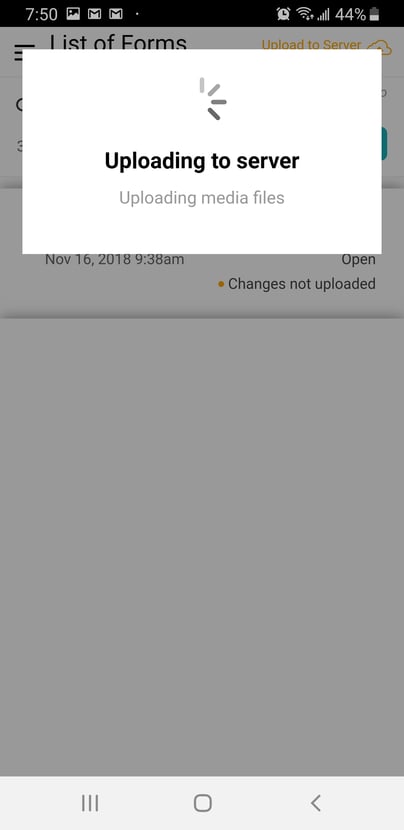
After a few seconds, the blue line will disappear indicating the changes have been uploaded.

Let's go back to TransForm Central to see the uploaded form in TransForm Tutorial Part 3: Managing Forms in TransForm Central