Welcome to the Designer Driven Workflow tutorial for Alpha Anywhere! In this 3 part tutorial, we are going to walk you through a design driven approach to Alpha Anywhere. This tutorial has been created to help design professionals successfully build apps for clients. As such, this tutorial will assume you have, at a minimum, some basic web and graphic design skills, and that you know and prefer to work following a design driven workflow. The tutorial already assumes you have installed the latest version of Alpha Anywhere and are ready to get started.
If you do not have a recent version of Alpha Anywhere installed, please check out, "Installing Alpha Anywhere".
Using this Tutorial
If you have two monitors, we recommend you keep this tutorial open on one monitor while you do the tutorial on the other monitor.
If you have one monitor, open this tutorial in another tab.
As a designer, you are likely to be somewhat familiar with the workflow we will be following in this tutorial. Essentially, this is a workflow built around conceiving of a project with the client, assisting that client to visualize the finished product by creating a sample, making that sample into a dynamic and functional application with Alpha Anywhere, and then delivering a tested and finished application to the client. This workflow is shown in the image below and will serve and the model for this tutorial.
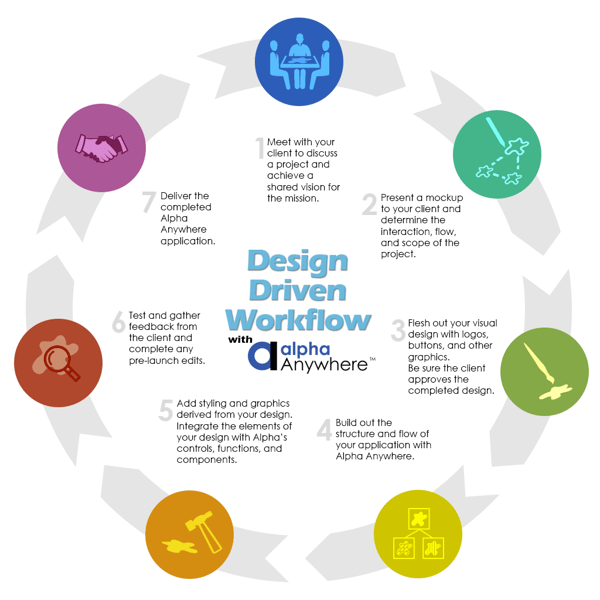
When you examine the chart above, you will notice that Steps 1 though 4 are focused on developing a shared vision for the project with the client and then building an approved project mockup.
Steps 4 is where we get started developing the application framework in Alpha Anywhere. This is the part we will focus on most to help designers better understand how to build out working applications.
Step 5 refers to converting the images of that mockup into a CSS/HTML web formatted mock using programs like Dreamweaver, UXPin, or coding manually if you prefer. This is often referred to as the handoff stage because this step takes the designed elements and formats them into a context that is easier to manipulate for programmers. In this case, we are going to use Alpha Anywhere to accomplish our goals, so we won't need to handoff the project, we'll do it ourselves!
Steps 6 is the all important step of testing and publishing your completed application. Extra care here is what helps us ensure a happy client upon delivery.
Step 7 is the good part. Pleasing the client with a finished project that fulfilled their needs.
Now that we understand the workflow, lets get started!
In this tutorial, we will assume that the app designer has worked through steps A through C and now has a mockup that represents the style and function of the app that they wish to build. In your future projects, you may find that the goals of you and your client might be most easily met by modifying one of Alpha Anywhere numerous component templates. Yes, you could build it from scratch, but why reinvent the wheel. This will be our approach in this tutorial.
If you are more interested in learning to design an application from start to finish check out the next tutorial from the Design Driven Workflow series, Design Driven Workflow Tutorial #2: Building Out Your Designs From Scratch. There we will demonstrate, using the same workflow, how to build a unique Alpha Anywhere application from scratch .
In the case of this demonstration, we are assuming that the client wishes to have an application that displays Twitter data, or Tweets, in framework that fits their companies design aesthetics. It just so happens that there is a generic UX component built into Alpha Anywhere that displays Twitter lists. We will modify that component to suit our needs.
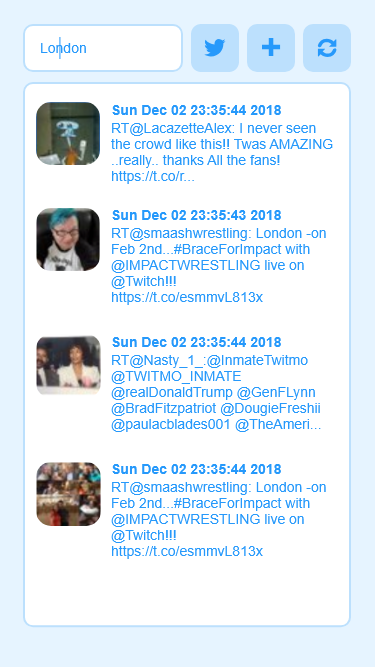
Now, since we've already done steps A through C, we have already created a mockup in Photoshop or some other design tool and gotten the client to sign off on it's design. The mockup we will be basing our styling from is shown below.
Through completion of these first few steps, you will now have an approved mockup and we know what we want the finished application to do. The next step would be generating HTML/CSS that creates a web ready version of our mockup. (Step D). We will walk you through how we did this using Adobe XD but if you aren't an adobe user or simply want to skip this stage, you can simply download the project files that we created in this section of the tutorial to use as reference in part 2: Modifying a UX Control from Template. Once you have those files, you will just need the Twitter API Keys.
In order to most easily translate your design into a working Alpha Anywhere application, the best next step is to create an HTML/CSS web ready version of the mockup. While it might be possible to build the application without this step, being able to copy and paste code directly from your mock up into Alpha Anywhere is very useful.
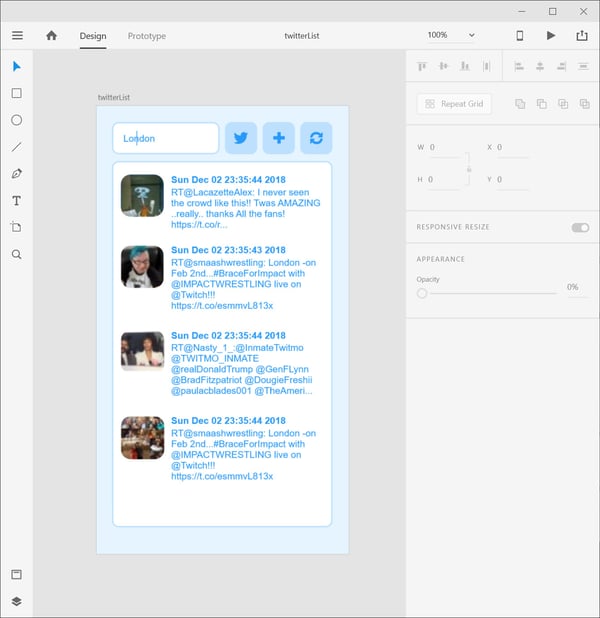
There are a vast number of different tools available to a designer to create in and also many tools that allow a user to output HTML/CSS code from a mock. It matters little whether your mockup design was originally created in Photoshop, Sketch, Gimp, etc. It's even quite likely that your design tools might have an HTML/CSS export function. The way I will do it in this tutorial is to take the design mockup that I built in Adobe XD and use it's Web Export plugin to export the HTML/CSS to a web page.
1. Open the design mockup in Adobe XD
2. Next we will want to make sure that the Web Export Plugin is installed. This is quite easy. First click on the Menu in upper left corner and you will select Plugins/Discover Plugins...
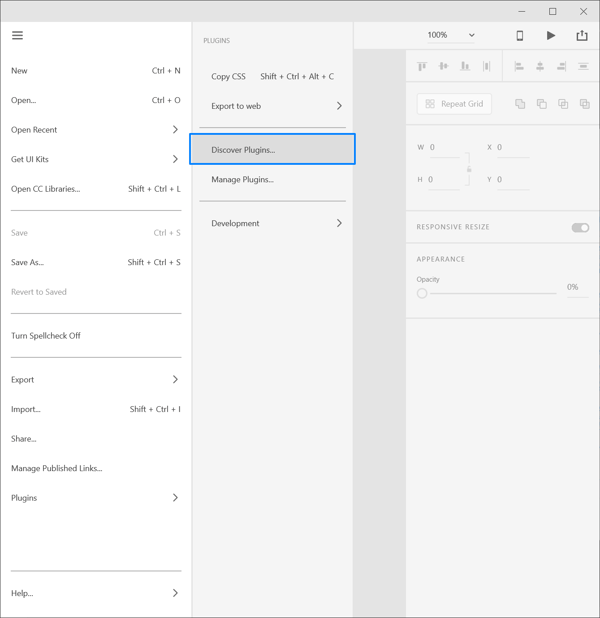
Make sure that the plugin called "Web Export" is installed. 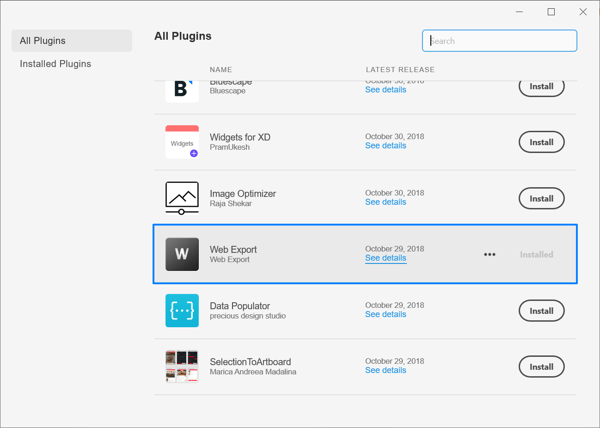
Then, in the menu, simply select Plugins/Export to web/Export Artboards to Page.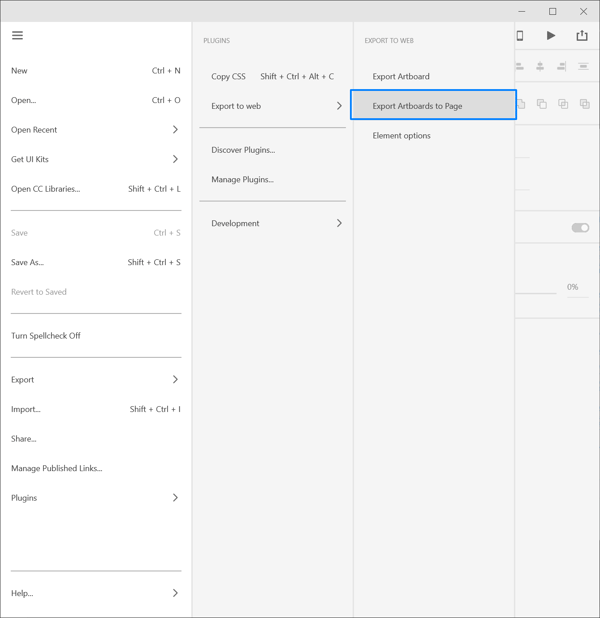
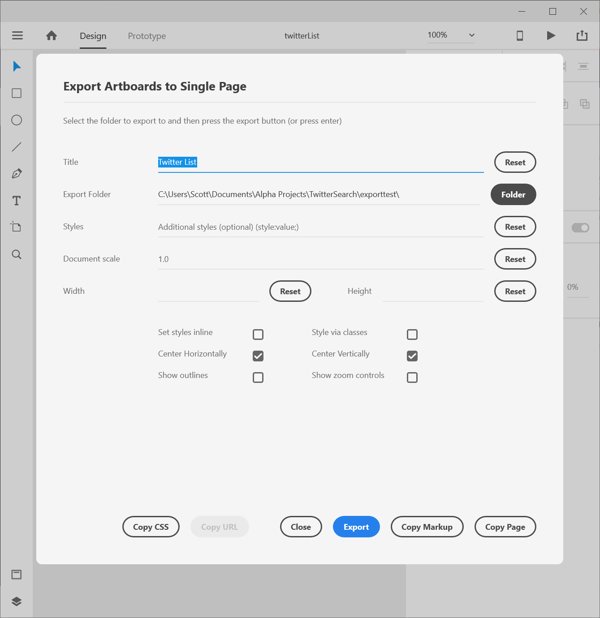
All you need to do is select the folder you wish to export to and then click Export.
Now your folder will be populated by an html page and some images. Because I did most of my work in in XD using vector graphics, much of the design translated directly to CSS and SVG leaving only the raster thumbnail images separate. That works out quite well because we won't need them since the content of the twitter list will be generated when the tool is activated. All the code we will want to reference to help us with our project can be found in the file that we generated called twitterList.html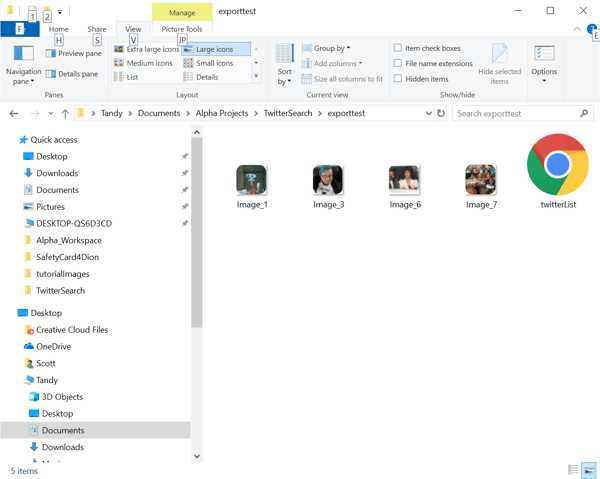
All done with this step! Now we have the files we need.
Before we move on from these files, I'm going to open the HTML file in Dreamweaver but you could use any text or html editor. We can quickly take note of some important aspects of the design that we will use in the next part of the tutorial. Most of the evidence we need to make note of is in the CSS style info found at the beginning of the pages code. Look it over to find all color codes, font names, and numbers for stroke width and radius.
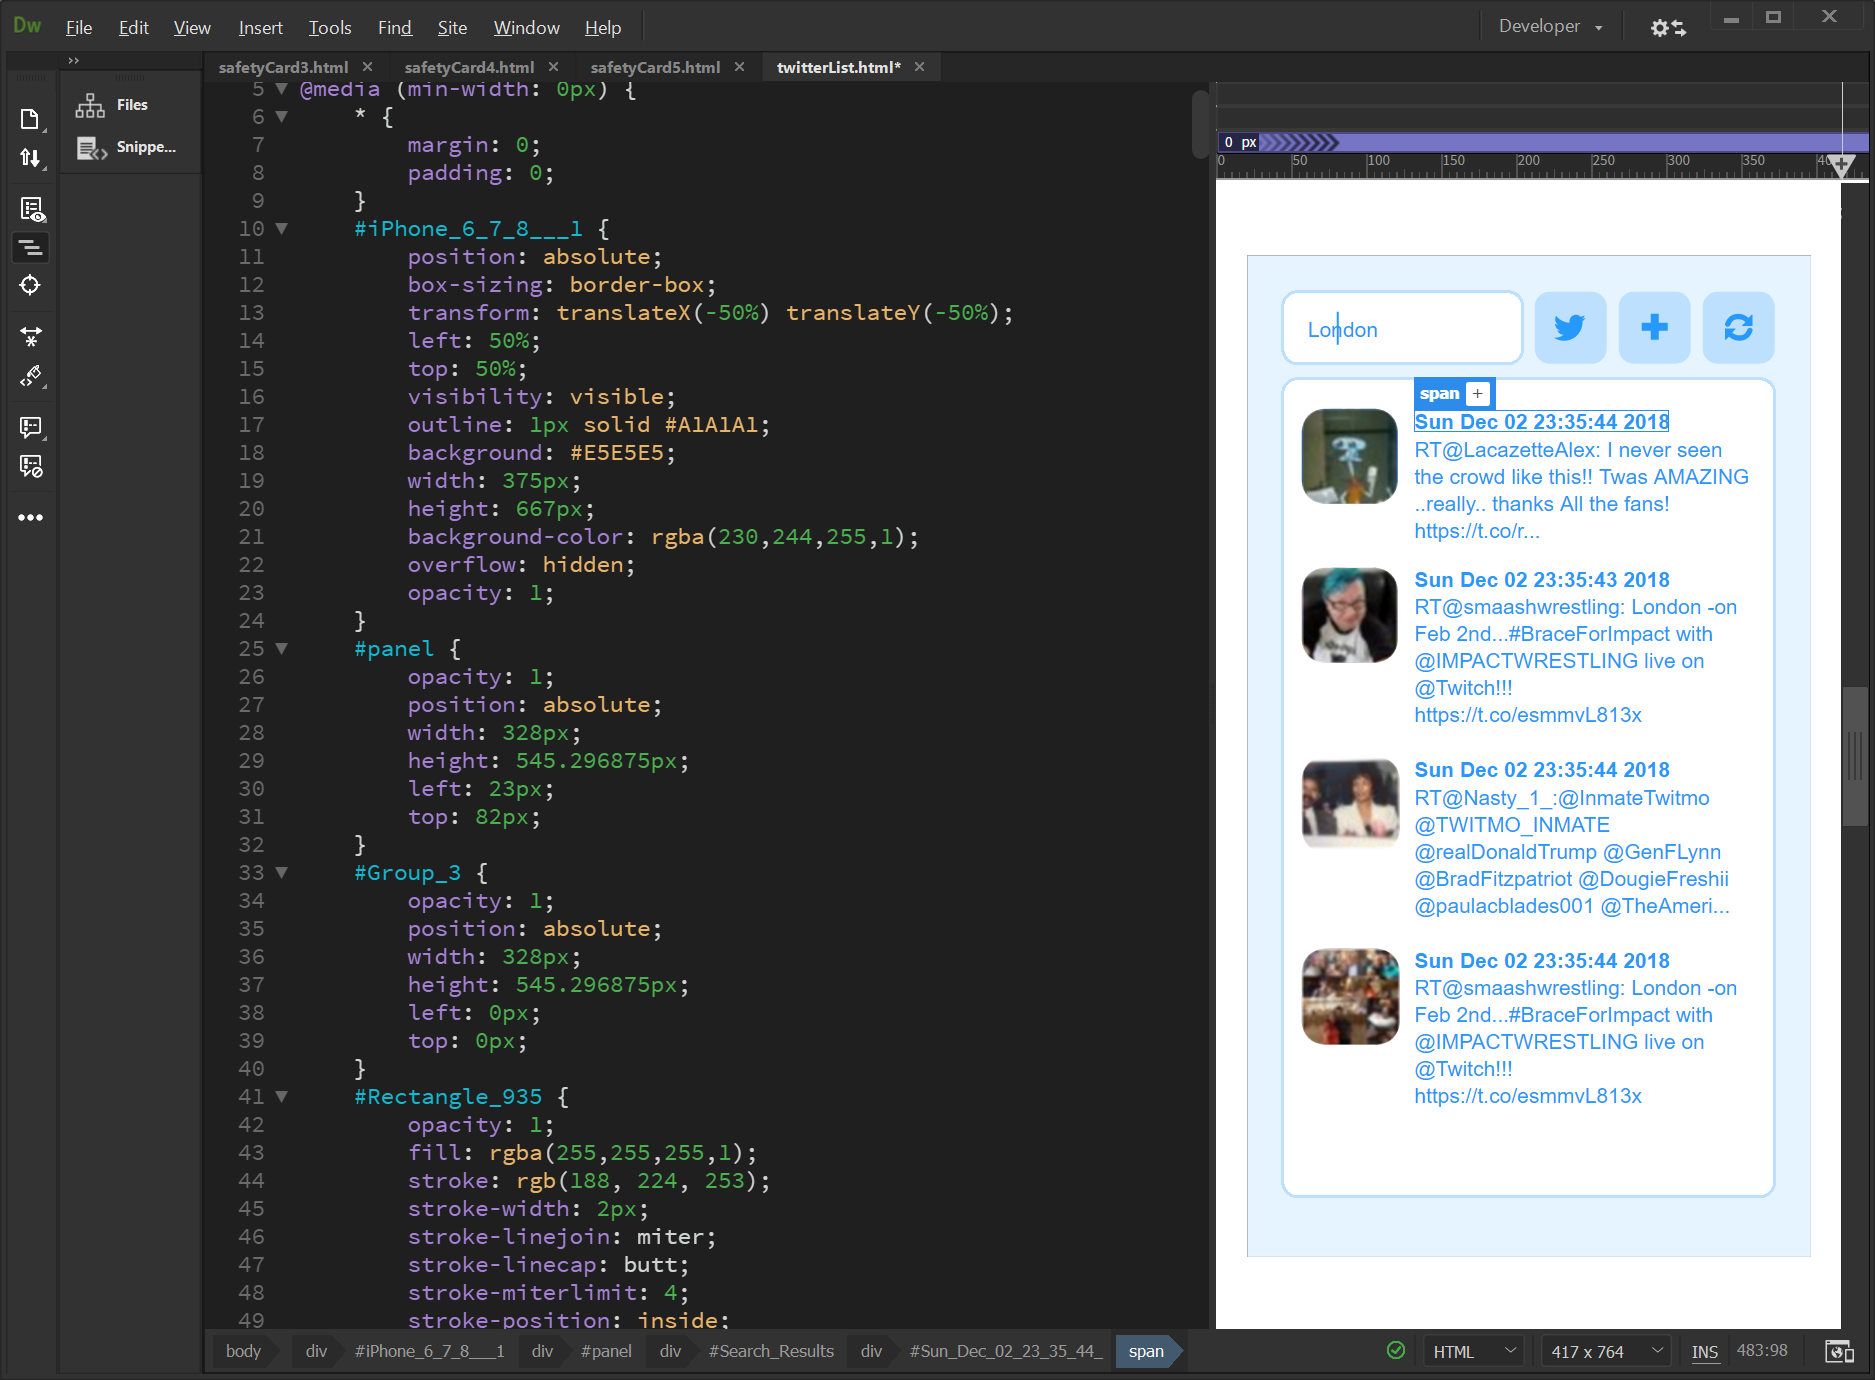
In the image above, we can see some color values. The light blue background is rbg(230, 244, 255, 1) . The list has a white or rgb(255, 255, 255, 1) background with a stroke color of rgb(188, 224, 253) . Some elements whose code is not shown in this image are the buttons, looking through the code you would find that the buttons have a background color of rgb(188, 224, 253) and the icons and list text have a color of rgb(38, 153, 251)
When you lookup the various rounded rectangles, you will see that they have a radius of 10.
Font used in the list is Arial.
We should make note of this information in a text file so we can cut and paste this info in Part 2 of the tutorial.
The other thing we need to take care of before we start building the Twitter List Application is that we need permission and the consumer access keys from Twitter. Our application will not function without it. Not to worry, getting the access codes is quite simple. Just follow these next few steps and we will be ready to go.
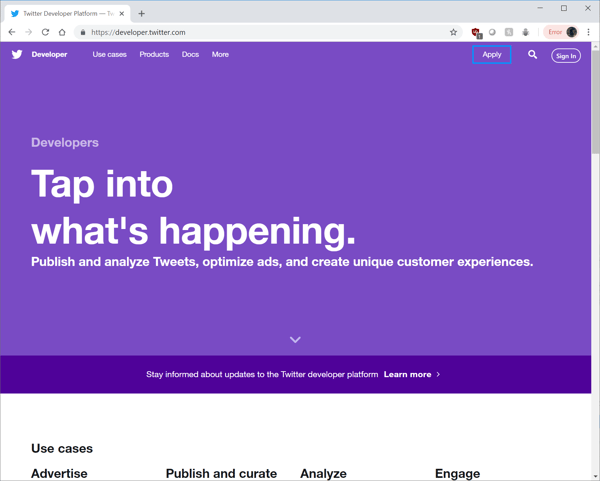
Step 1: Go to https://developer.twitter.com/ and click the "Apply" link in the upper right.
Step 2: Fill out the Developer Application Form.
You will need to enter in some basic information and describe how you will use Twitter data.
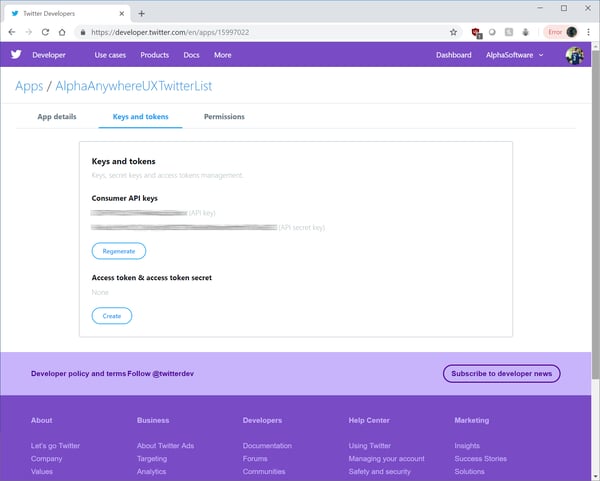
Step 3: Make note of your Consumer API Keys. A good choice would be to copy & paste both your API Key and API Secret Key into a text file and save it for use in Part 2 of the tutorial.
Now that you have a clear vision for the project, some files to use as design reference, and your Twitter API keys, we are ready to begin building in Alpha Anywhere, Let's build our App in A Workflow Part 2: Modifying a UX Control from Template.
----
Further reading: Visit our Step-by-Step Guide to Building a Mobile App that discusses up-front planning and UX design.

Alpha Software helps organizations build operational applications for data collection, workflow automation, reporting, inspections, compliance, and AI-assisted operations.
Mobile ready. Always.
Available on iOS and Android for connected and offline operation.

© 2026 Alpha Software Corporation. All rights reserved.
