Welcome to Alpha TransForm! In this 3 part tutorial, we'll walk you through the process of creating, filling, and submitting your first form in Alpha TransForm. NOTE: You may want to watch this tutorial as a video before doing it yourself. Watch it here.
Using this Tutorial
If you have two monitors, we recommend you keep this tutorial open on one monitor while you do the tutorial on the other monitor.
If you have one monitor, open this tutorial in another tab.

Create Your Account and Log In
- If you do not have a TransForm account, create a new account now by clicking this link to open the registration page (opens in a new tab in your browser.)
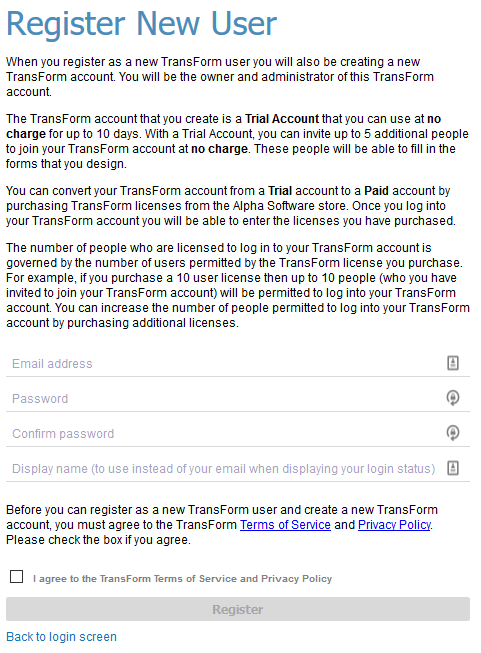
- After you create your account, you will be logged into TransForm Central.
- If you already have an account or want to return later, go to transform.alphasoftware.com to log in and return to TransForm Central.
Design Your First Form Type
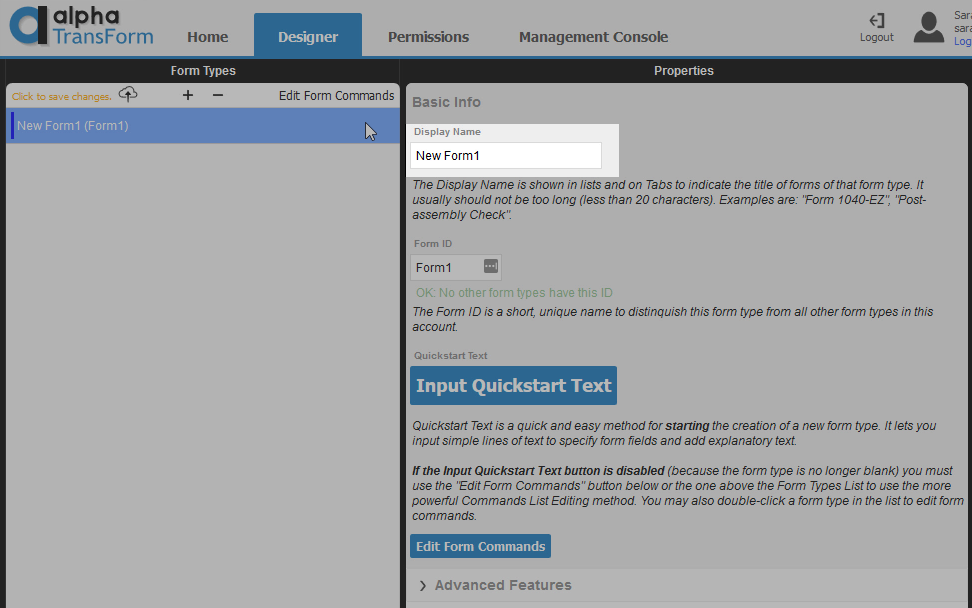
In Alpha TransForm, a "form type" is the term for a form design. Let's begin by creating a new blank form type.
- Click on the Designer tab. Because you do not have any form types yet, a dialog box appears asking what you would like to do.

- Click Add Blank to close the message and create a new form type. Alpha TransForm will create a new Form Type with a Display Name of
New Form1 .
The Display Name is the name that will be displayed in TransForm Central Designer and Management Console tabs. The Display Name is also shown in the Alpha TransForm mobile app.
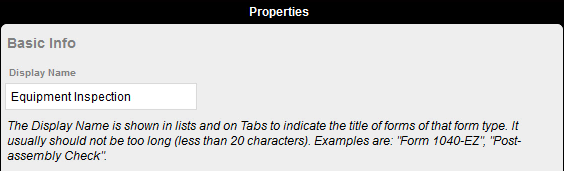
- Type
Equipment Inspection in the Display Name text box. This gives the form a meaningful name.
- Click the Input Quickstart Text button.
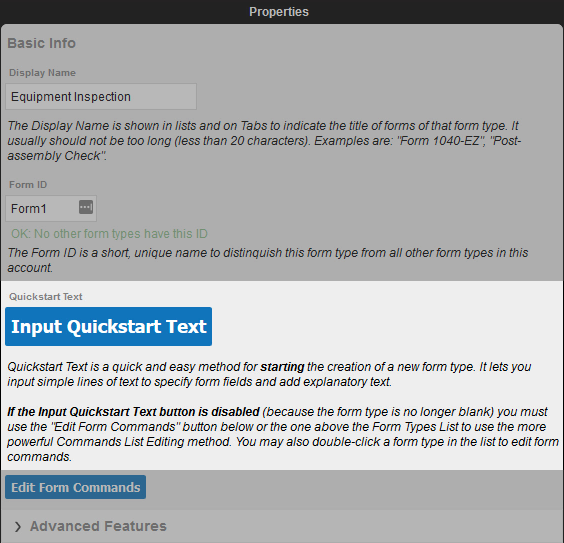 This will open the Quickstart Editor, which we will use to design our first form type.
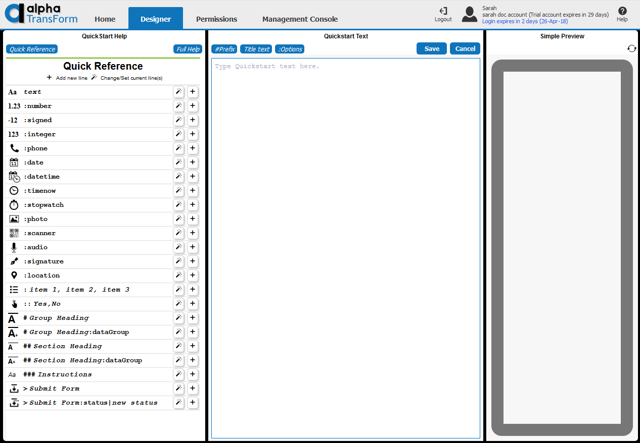
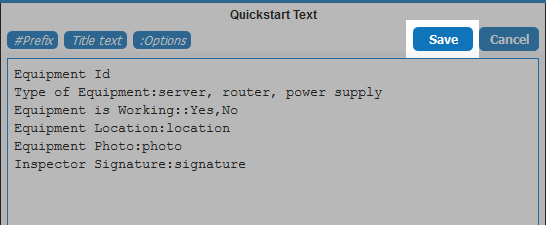
- Let's build the Equipment Inspection app. Type or copy-paste the following text into the Quickstart Text editor:
Equipment Id
Type of Equipment
Equipment is Working
Equipment Location
Equipment Photo
Inspector Signature
- Place your cursor on the same line as the "Type of Equipment" field.
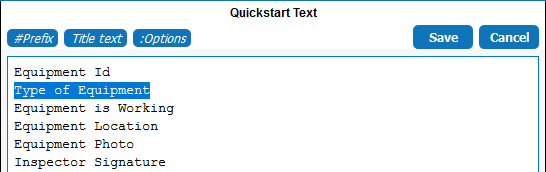
- Click the Set Button
for the :item 1, item 2, item 3 option in the Quick Reference to change the Type of Equipment field to a list of choices. By default, three choices are assigned: Small, Medium, and Large.

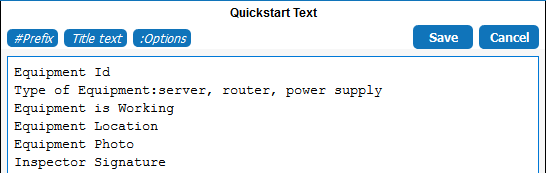
- Select the text
Choice 1, Choice 2, Choice 3 in the Quickstart Text editor and delete it. Then, type server, router, power supply after the colon to match the image below:
- Place your cursor on the same line as the "Equipment is Working" field.
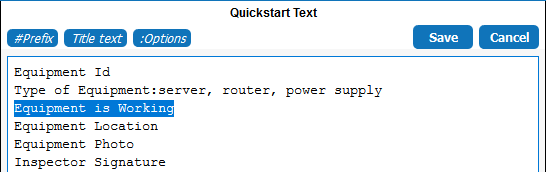
- Click the Set Button
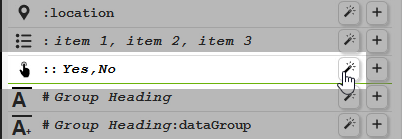
for the :: Yes,No option in the Quick Reference to change the Equipment is Working field to a button list. By default, the button list has two options: Yes and No.
The format of defining a button list is defined as the field name with a comma-separated list of choices prefixed with two colons. "Yes" and "No" are the two options we want for the Equipment is Working field, so we'll keep the default options. (Please do not remove the colons or the commas, they are required for the form to work properly)
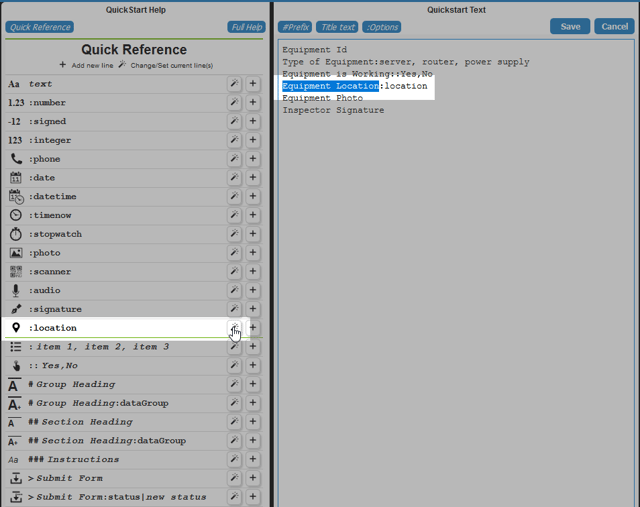
- Place your cursor on the same line as the "Equipment Location" field.
- Click the Set Button
for the :location option in the Quick Reference. This will set the field type for the Equipment Location field to a location field.
A location field is a special field that captures the user's current location and renders it as a map in the form.
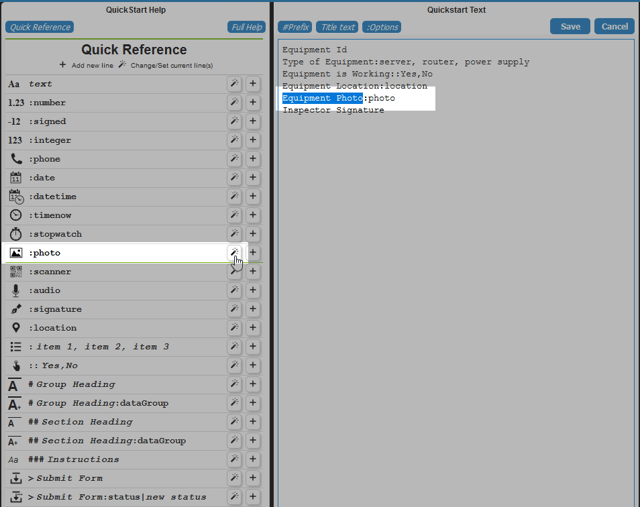
- Place your cursor on the same line as the "Equipment Photo" field.
- Click the Set Button
for the :photo option in the Quick Reference. This will set the field type for the Equipment Photo field to a photo field.
A photo field is a special field used to capture images on the user's device. It opens the user's camera and lets them take a photo, which is then saved and displayed in the form.
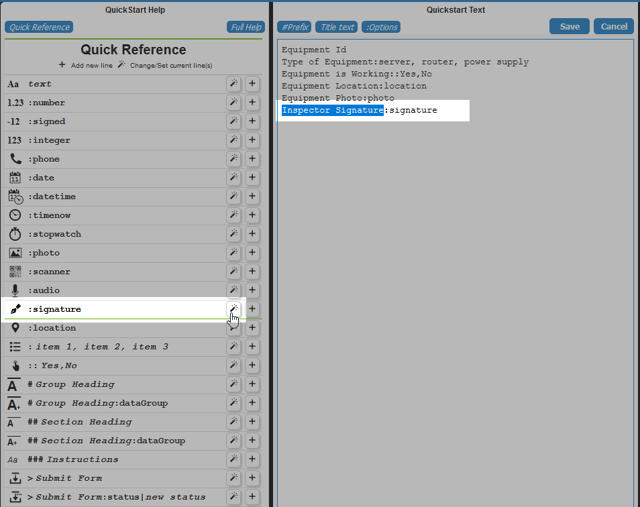
- Place your cursor on the same line as the "Inspector Signature" field.
- Click the Set Button
for the :signature option in the Quick Reference. This will set the field type for the Inspector signature field to a signature field.
A signature field presents the user with a signature editor that they sign with their finger or stylus. In addition to capturing the user's signature, it also capture the date and time the signature was captured.
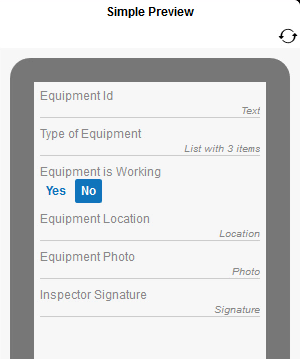
- Review the fields in the Simple Preview window to verify that the field types for each field match the image below. You should have 6 fields: a text field, a list with 3 items, a field with two buttons, a location field, a photo field, and a signature field. If the fields do not match, make the appropriate changes.
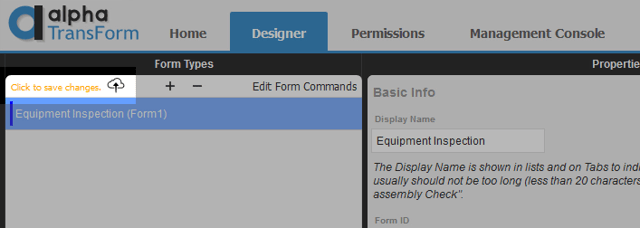
- Click the Save link to save the Equipment Inspection form and return to the list of forms.
 Important: Once you save, you will no longer be able to edit these fields using the Quickstart method. Instead, you can edit these fields by clicking the Edit Form Commands link (Form Type column) or button (Properties column) on the Designer tab.
- Click Click to save changes to save the new form to the TransForm cloud so that it can be accessed on a mobile device running the Alpha TransForm app.
Creating a Form Type from a Template
Forms can also be created using a template. To learn how this is done, see Creating a new Form Type from a Template.
End of Part 1
Now that you have created and uploaded a Form Type, let's go try it out in TransForm Tutorial Part 2: Using the Alpha TransForm App.
